AT A GLANCE
PARTNER FOCUS
LENSEC Partners Provide Testimonials
PVMS HIGHLIGHT
PVMS Interface Features Multiple Languages

The LENSEC sales team is growing. We’ve recently added staff to the global sales team and we’re reaching more people, providing the Power of Perspective VMS® to a multitude of people working to enhance their security footprint. Join us as we welcome our newest staff members to the LENSEC Team.
 Patrick Hart joins LENSEC as Regional Sales Manager for North America in the Western Region. Patrick has over 20 years experience in the security industry. He says, “I make customers and integrators comfortable and confident in their decisions. I specialize in Video Management Systems, Remote Video Monitoring, and Video Analytics.”
Check out Patrick’s introduction video below or schedule a demo with Patrick to learn more about PVMS.

 Mohamed El Nashar is the newest member of the LENSEC Sales Team. Mohamed lives in Egypt and joined LENSEC at the beginning of October. He has over a decade of business management and network security skills. Mohamed is LENSEC’s Regional Sales Manager in North Africa.
Mohamed is ready to connect in North Africa. If you want to find out more about Perspective VMS®, contact Mohamed by email at [email protected].
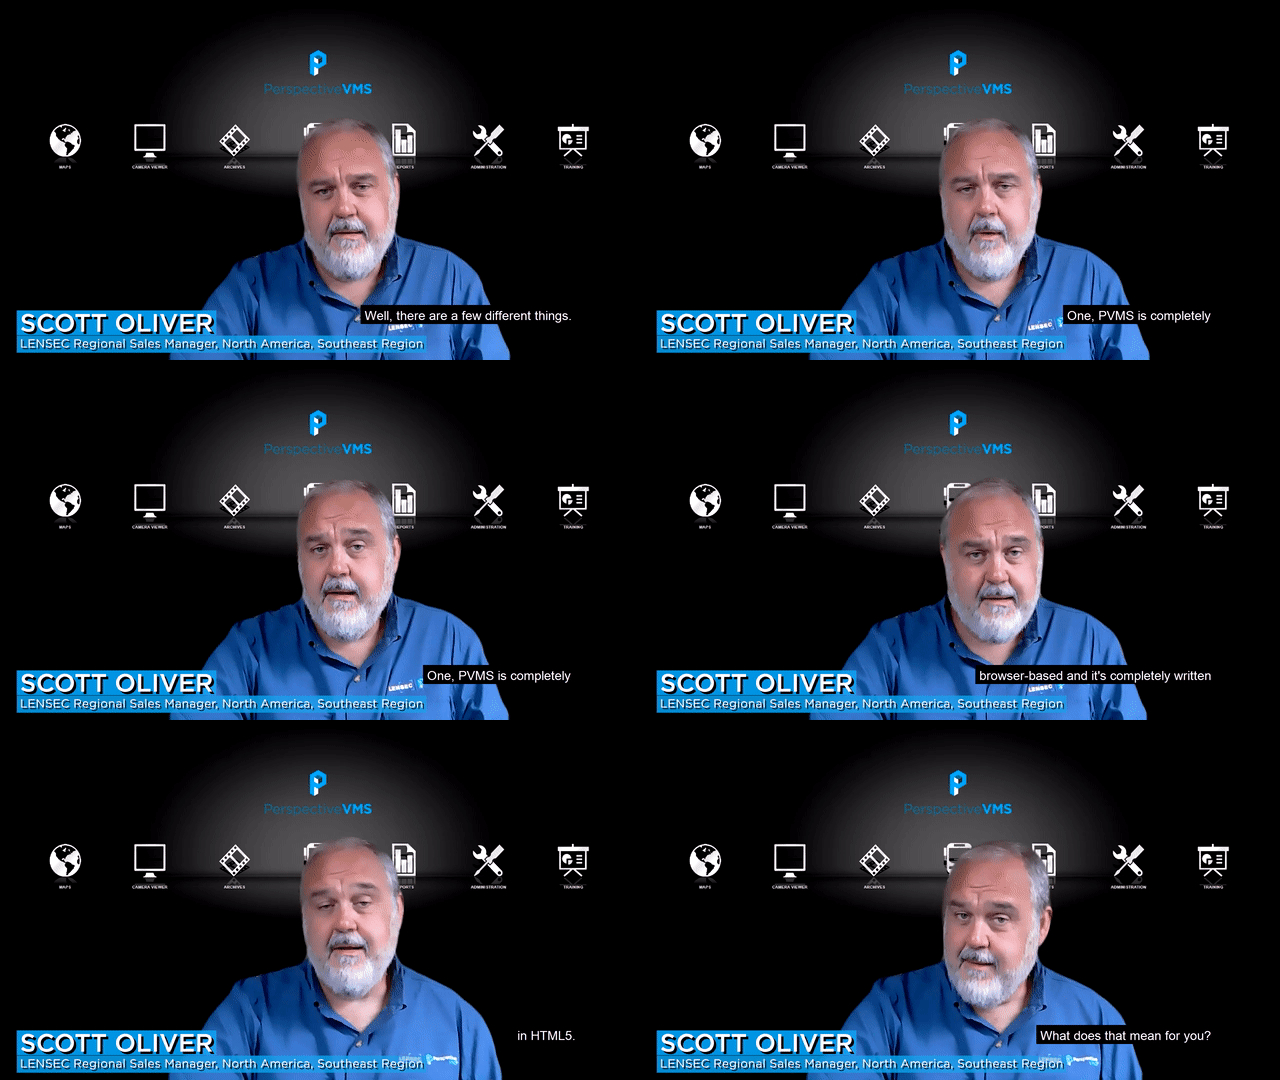
 Scott Oliver is LENSEC’s Regional Sales Manager in North America in the Southeastern Region. Scott lives near Atlanta, GA and has over 2 decades of experience in the security industry, both in security integration and in manufacturer sales. Scott applies dynamic business development and relationship building skills to his work engaging with customers and partners in the Southeast.
Check out Scott’s introduction video below or schedule a demo with Scott to learn more about PVMS.
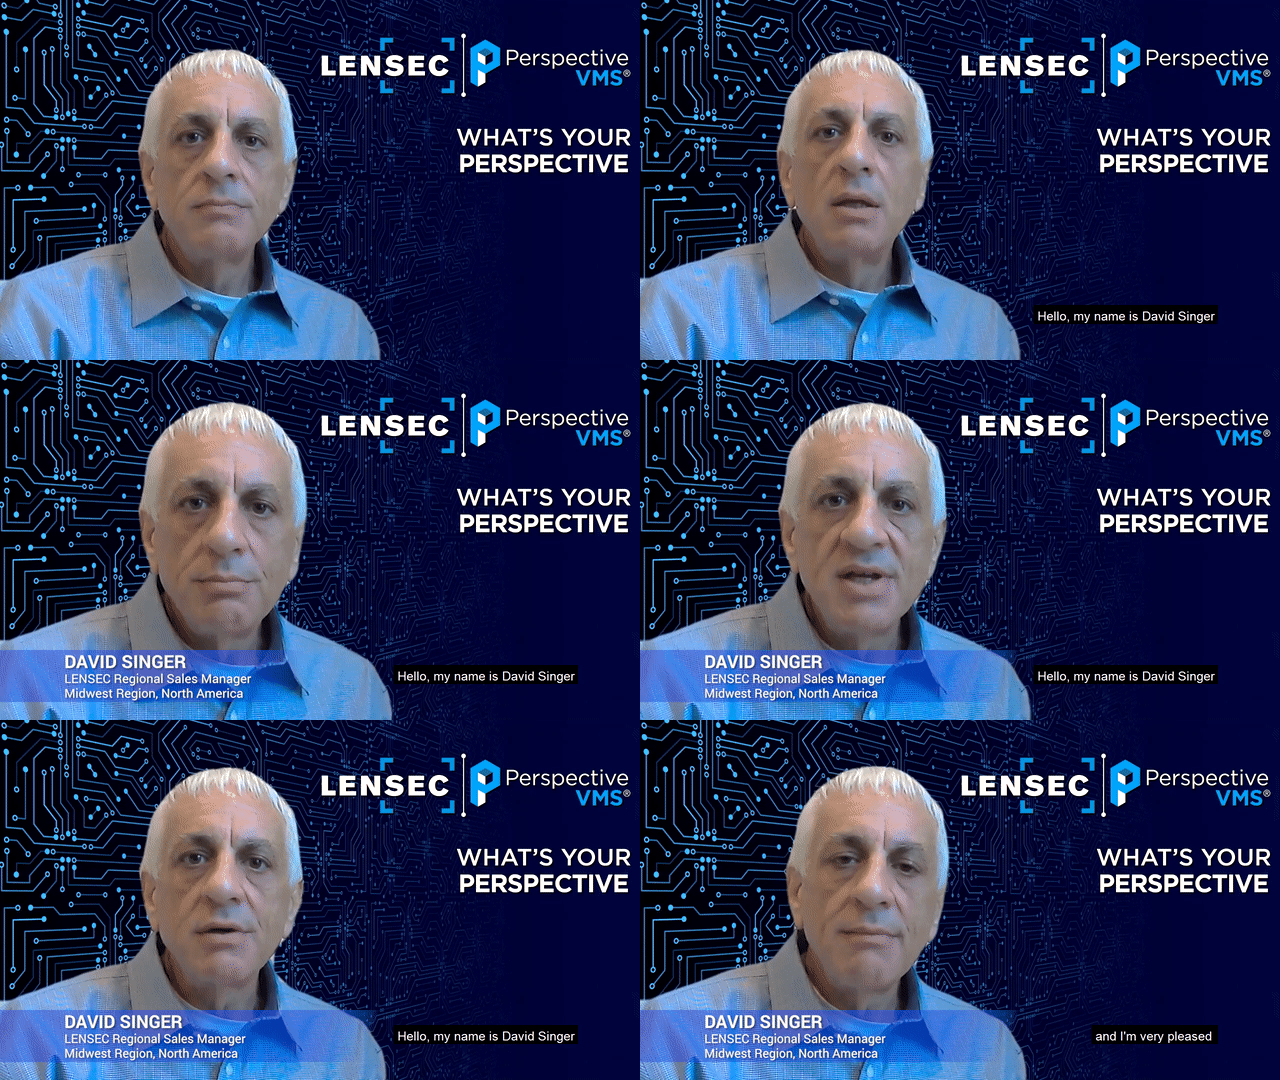
 David Singer is LENSEC’s Regional Sales Manager in the Midwestern Region of North America. David has many years of experience working with and representing many large physical security manufacturers. David is a Florida Gator fan, yet he lives in Detroit.
Learn a little bit more about David in the video below or schedule a demonstration with David to learn more about PVMS .
PVMS PRODUCT USE CASE
Using Video Analytics With Perspective VMS® To Detect People Without Face Masks
By: Keith Harris
Businesses, Universities, and K-12 schools are all facing unique challenges as they plan to return to work and school. Many states and local jurisdictions are passing policies and ordinances with the goal to mitigate another outbreak. This makes for difficult times with hard decisions ahead.
With the pandemic, many people are looking for ways to ensure the safety of their co-workers, customers, and others. Face masks are necessary and controversial. Some people feel best if they and others around them wear masks. Others think it should be a personal preference. Despite the controversy, most businesses and places where people gather are requiring face masks while indoors.
Nobody wants to enforce rules about masks, but some administrators may find it necessary to know when people aren’t complying with face mask guidelines. For example, in a hospital or nursing home, it might be crucial for everyone to keep their mask on. It could be a life or death matter to protect immunocompromised patients from the spread of disease.
At LENSEC, our goal is to keep people safe and assets secure. That goal has never been more important than now. Our employees stand with you, ready to assist and provide the technology solutions to help you navigate through these uncertain times.
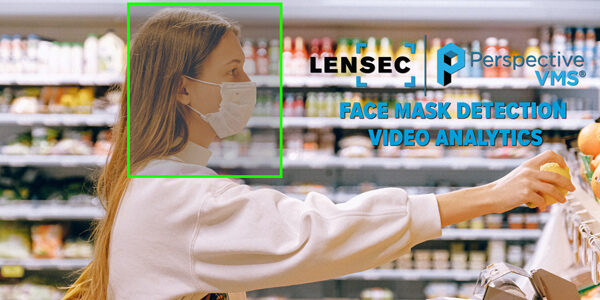
FACE MASK DETECTION VIDEO ANALYTICS
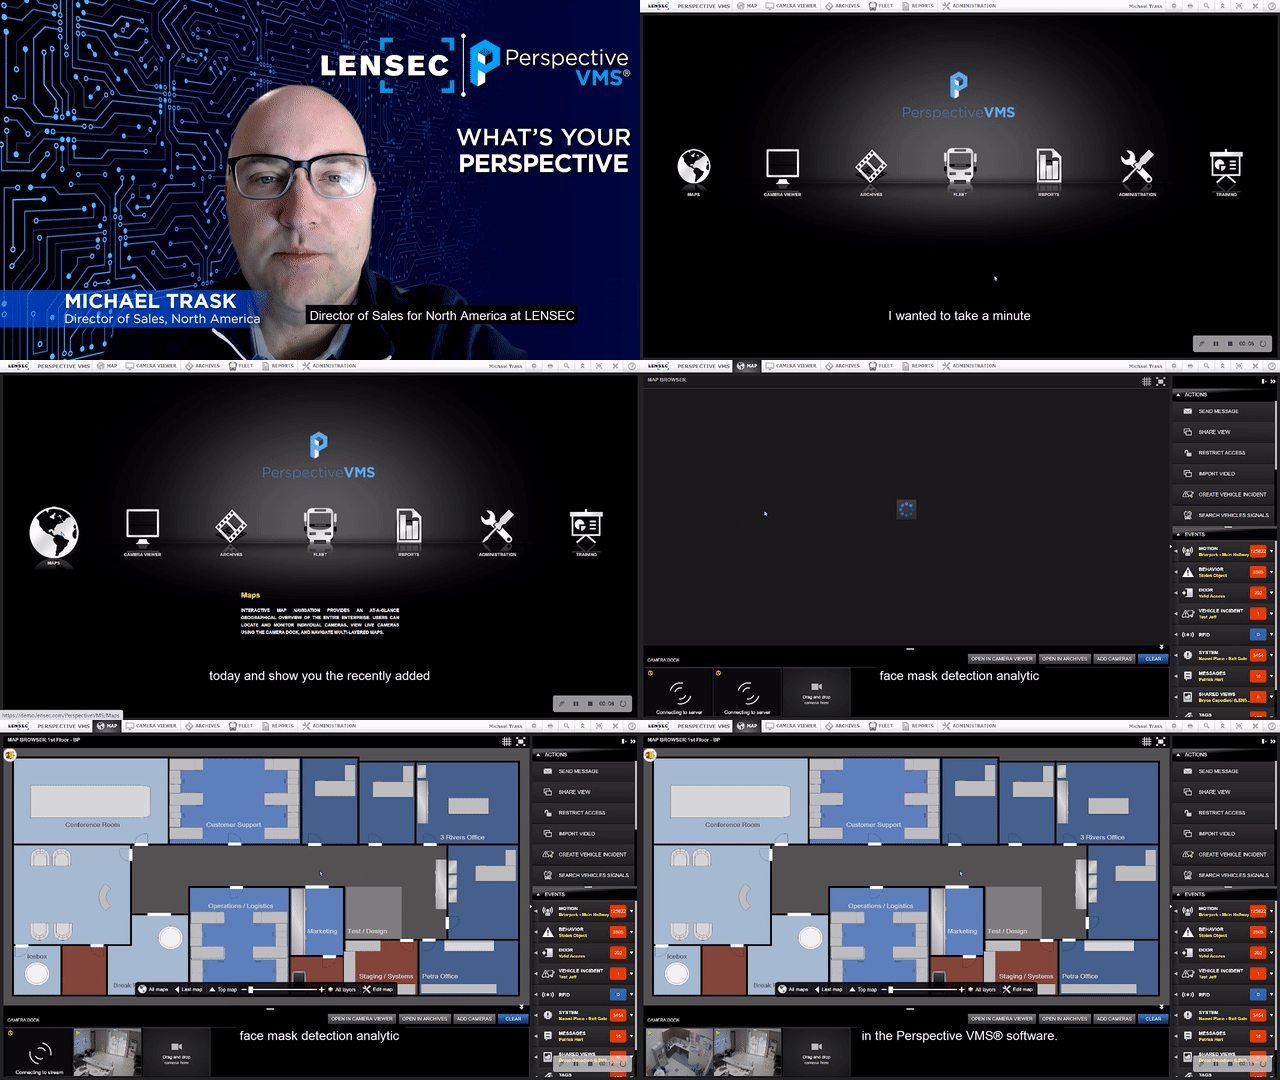
LENSEC is introducing a video analytic that works with our enterprise video management software. This analytic detects whether people are wearing face masks or not. It uses face detection technology designed to signal when a face is present in a video recording. Our technology partner has made changes to the analytic to help detect whether or not a face mask is in use by people passing nearby the camera.
The team at LENSEC believes this analytic is a valuable tool for administrators looking to understand how people are complying with face mask rules in their facilities. The face mask detection analytic is an advancement on the existing face-detection analytic to now be able to identify whether a person is wearing a face mask or not. When paired with a PVMS workflow analytic trigger can then set off an alert your staff to non-compliant employees or guests in your business.
EFFECTIVE DECISION-MAKING
Video Analytics use smart algorithms for effective decision-making. They generate automated alerts to trigger actions and reduce false alarms. Perspective VMS® by LENSEC uses server-based video analytics from 3rd party providers. Our team has integrated those analytics into the PVMS platform. Perspective VMS® also works with edge-based video analytics provided by camera manufacturers and installed on the camera.
There are a few more video analytics that we would consider helpful while administrators are monitoring people during the pandemic. Here are a few analytics LENSEC offer with PVMS:
- The Area Counting Video Analytic calculates the dwell time and number of persons within specified areas, signaling when the number exceeds or falls below the threshold.
- The Occupancy Rate Video Analytic estimates the percentage of occupancy of virtual areas by subjects of interest, and signals users when the percentage exceeds the defined threshold.
- The Hot Zone Video Analytic estimates and provides visualization of colors indicating zones with higher or lower density of persons within virtual areas across a defined timeframe. NOTE: This video analytic is not designed for fever detection.
More tools available for use within Perspective VMS could be helpful with contact tracing. Contact Tracing uses two features within Perspective VMS®. With PVMS Fast-Find and Neighboring Cameras, you can quickly perform contact tracing within your property. If you are informed of an employee or visitor who has tested positive for Covid-19, you can quickly find them using Fast-Find. You may use Neighboring Cameras to track individuals as they move throughout the property to confirm their activities and determine which areas and items they may have touched.
LENSEC SUPPORT
Bitrate and Camera Configuration, Part II
Smart Camera Locations & Image Complexity
By: Bryce Capodieci
Editor’s Note: Over the next few newsletters, we will focus on a four-part feature series designed to help people understand the intricacies of camera configuration and bitrate usage. Here are the topics we have planned for this series:
- July 2020: Choosing The Correct Codec, Resolution, & Video Quality
- October 2020: Smart Camera Locations & Image Complexity
- January 2021: Camera Settings
- April 2021: Summary of Solutions
Part 2 of 4
In part one of this series, we discussed how the streaming codec and video quality affected the bitrate. These are configurable settings within the camera interface or, in some cases, the VMS as well. Next, we will focus on external factors that affect the bitrate, though not all elements are in our control. However, understanding how or why these factors affect the bitrate will provide insight into these issues.
Technicians can manage camera location, or specifically, the camera’s field of view in a way that reduces the bitrate produced by the image complexity for that particular camera. The two following scenarios showcase this practice.

SCENARIO 1 – Outdoor Camera Covering A Parking Lot
- Problem: A camera is placed relatively low to the ground. The camera may have been intended for license plate identification. The field of view is balanced to also provide an overview of the parking lot. Because of the camera placement, the field of view captures part of the horizon. The setting sun poses problems for the camera and increase the camera’s bitrate.
- Solution:
- There are two problems in this scenario. The first problem goes beyond the scope of this article. It addresses the issue of using a single camera for multiple applications. A camera can be for identification or to capture an overview. However, a single camera should not be used for both purposes. If you raise the camera and lower the field of view to remove the horizon, this will improve your bitrate during sunsets or sunrises.
SCENARIO 2 – Indoor camera covering hallway with full view of entry
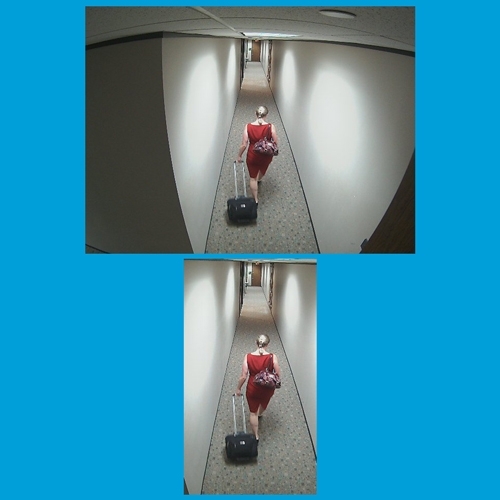
- Problem: A hallway camera is positioned to capture activity in the corridor. The aspect ratio is set to 4:3 and captures much of the side walls and activity through the entry way at the end of the hallway.
- Solution:
- There are two factors at play here that can reduce the bitrate of the hallway camera. First, let’s address the aspect ratio and the field of view. When installing a hallway camera, it is a best practice to change the aspect ratio to 16:9 and rotate the camera 90° whether physically or via configuration settings in your video management software. This optimizes the field of view to show the relevant activity in the hallway, not recording unnecessary data, such as the surrounding walls. The second factor addresses the issue of the doorway at the end of the hallway. This could be an exterior entry where constantly changing light conditions will affect the bitrate of the camera. This entry way could open to view other complex scenes such as traffic, trees blowing in the wind, and/or people walking by. If the purpose of the camera is to record activity in the hallway, position the camera higher if possible and lower the field of view to remove activity beyond the doorway from the camera view.
SCENARIO SUMMARY
In these two scenarios, we touched upon several external factors that encompass scene complexity. Some factors are manageable, others are not. If you can minimize the scene complexity, you can lower the bitrate as well.
Video image contents can range from a simple scene to a complex scene. Simple video images will consist of low activity, low content, and static lighting.
- Low Activity – Low or intermittent motion.
- Low Content – Limited number of items in the view, such as a spartan room.
- Static Lighting – Light that doesn’t change much or contains soft light that casts soft shadows, as with incandescent bulbs.
Complex scenes can add a dramatic increase to your bitrate. Such examples include higher activity, more content, and dynamic lighting.
- Dynamic Lighting – Lighting that is constantly changing, like rolling clouds randomly allowing the sun to shine brightly through holes and to cast deep shadows within the cameras field of view.

CONTRASTING IMAGES
Contrasts between light and dark areas within a scene adds to the scene complexity. Multi-colored items versus consistent colored items, texture and camera movement or vibration can add dramatic increases to the bitrate. Camera vibrations may be caused by items such as wind, nearby heavy vehicle traffic, or loud noise from heavy machinery.
Activity levels can have a different effect on the bitrate. Objects moving in a straight line with a constant speed can have a lower bitrate. In comparison, objects that are spinning, zig-zagging, accelerating and decelerating increase the bitrate needed to transmit the video.
The reason for this is the predictive nature of the streaming video codecs, like H.264 and H.265. The mechanics of how this predictive nature of a streaming codec works relies on the I-frames and P-frames. The I-frames (Intra-coded pictures) are essentially reference pictures that are sent from the camera. The P-frames (Predicted pictures) are only the changes in image between I-frames. Essentially, the more I-frames you have in a stream of video, the less video compression you have. Less video compression means a higher bitrate.
LIGHT’S AFFECT ON BITRATE
As mentioned previously, light plays a significant role in the bitrate. But exactly how does light affect the bitrate? On one end of the spectrum, no light means activity can’t be seen. If the camera is unable to capture activity, it uses very little data. As you approach the opposite end of that spectrum, the outcome becomes obvious. The more light provided to the camera; the more activity is captured. As the light increases, the scenes have the potential to increase in complexity. Camera technology uses ‘gain’ to increase visibility in low light situations. This harms the efficient use of bitrate. As gain increases due to low light, noise in the data also increases, which means the bitrate increases. Additionally, the random nature of noise increased by the camera gain makes the video more difficult to compress.
MANAGING CAMERA SCENE AND CONDITIONS
The key thing to remember is you may have neither the ability to manage scene complexity, nor how it affects the bitrate. However, in certain situations, you do have the power to remove unnecessary data depending on your camera placement. Camera placement and managing the camera’s field of view does affect the bitrate. In Part III of this series, we will discuss how camera settings and features can play a role in effecting the bitrate.
Watch for the next installment of this series in the January edition of The LENSEC Perspective Newsletter.

Editor’s Note: At LENSEC, we want to provide the best tools possible to our partners and Perspective VMS® end-users. We’re writing up technical guides for creating video extractions from surveillance video archives. Over the next few newsletters, we will focus on a four-part technical series designed to help with the key elements of video extractions. Here are the topics we have planned for this series:
- July 2020: Creating Real-Time Extractions
- October 2020: Locating Your Extracted Files
- January 2021: Creating Archive Video Extractions
- April 2021: Troubleshooting Real-Time Video Extractions
Part 2 of 4
Video extractions are created from recorded video. They can be made in real-time from live video or extracted from recorded video in Perspective VMS®. Once the video extraction is complete, users can download the file to be played in a standard media player, like VLC Player.
Locating the video extraction may seem tricky to the novice, but it’s a simple process. This technical guide will explain the proper steps for locating and viewing video extractions.
Viewing Your Extraction
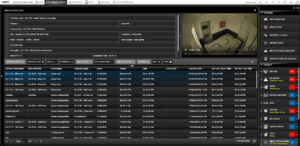
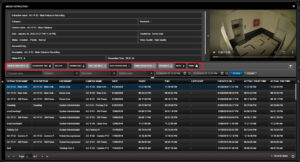
1. If the ‘Open Extraction’ is checked when configuring your extraction settings, and after you click ‘SAVE’, then the Image Extraction table slides open from the right sidebar.
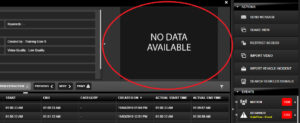
2. It may take a few minutes beyond the extraction duration you set for your video to compile. You will have to refresh your screen to view the video when it is ready. Until then, you will see “No Data Available”.
3. Once your video is available, you can click the download button to save the video in any location on your workstation or network that you specify.
Previous Extractions
1. If ‘Open Extraction’ is not checked when configuring your extraction settings, then you will need to manually locate the extraction.
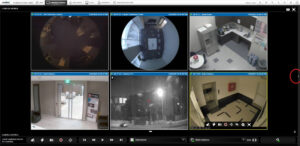
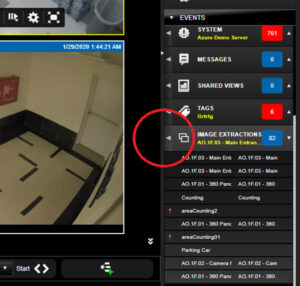
2. To locate saved extractions, navigate to the right sidebar. If you can’t view the right sidebar, click on the arrow on the far right of your screen to expand the right sidebar.
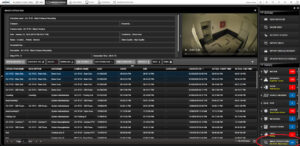
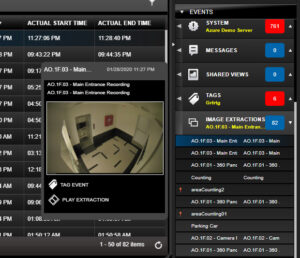
4. Click on ‘Image Extractions’ to open a quick view of the latest extractions. You may have to scroll down to see the list of these extractions that were saved. From the list, select an extraction. A video thumbnail will pop up so you can easily see and play the video. This is useful when you have many extractions saved and wish to easily find a specific extraction. You can easily click through the list to see the video thumbnails of each extraction listed.
-
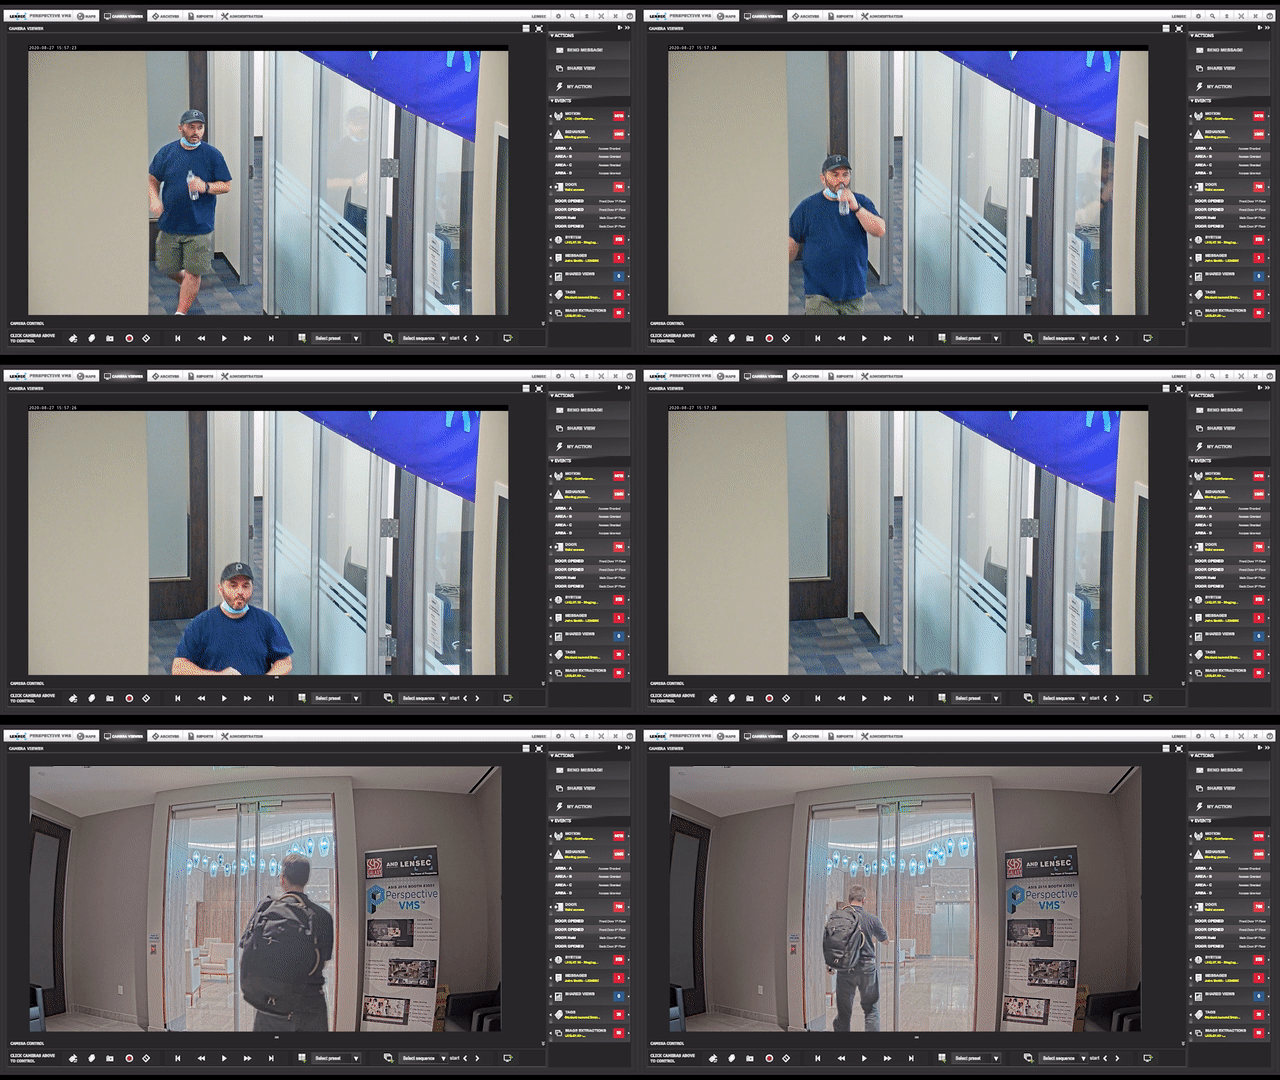
- Each of the items within the ‘Events’ category has boxes with numbers. These are the recorded number of alerts or events.
- The number represents the current number of alerts or events in that category.
- If the box is red, the alert or event has not been viewed or acknowledged.
- When you acknowledge or view an alert, the box turns blue.
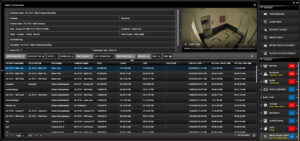
5. To see the detailed table view of extractions, click the arrow pointing left on ‘Image Extractions’.
6. This table stores the complete list of extractions, located on the bottom portion of the screen view. Each column is sortable. Click to highlight the extraction you wish to view. Each column within the row displays the information you configured for the extraction. The top fields provide some additional information about the extraction.
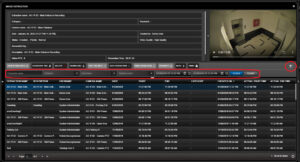
7. To search for your extraction, click on the filter icon ![]() . Several search fields will appear. To narrow your search, you can search by one or more of the following search criteria. Once selected, click ‘Filter’ to retrieve your search results.
. Several search fields will appear. To narrow your search, you can search by one or more of the following search criteria. Once selected, click ‘Filter’ to retrieve your search results.
-
- Extraction name
- Category (drop-down menu)
- Username (drop-down menu)
- Camera name (drop-down menu)
- Date – begin
- Date – end
8. There are several buttons that can be used to interact with the extraction. If the button is greyed-out, that particular action is not available for this specific extraction. As an example, if the extraction is still in process, most of the buttons will not be available until the extraction completes.
- View In Archives – Click this button to view the recorded video from this camera
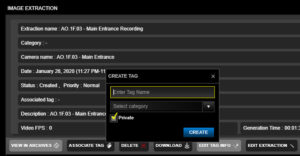
- Associate Tag – a tag is like a bookmark, use this feature to tag the archived video, which can be easily seen in the video archive timelines as a yellow band. Mark this as ‘private’ if only you need to see this tag.
- Delete – Remove the extraction from this list.
Note: the extraction will still appear in the audit logs. - Download – Download the extraction to any location on your workstation or network. This is permanently saved, until manually deleted.
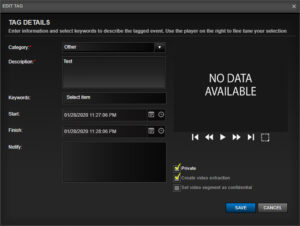
- Edit Tag Info – Edit tag with updated information
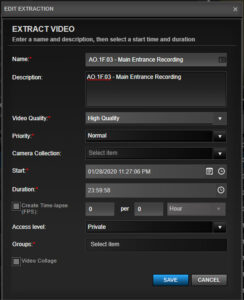
- Edit Extraction – update the information you configured in your original extraction setup.
- Create Time-Lapse (FPS) – only available for archive video extraction.
- Video Collage – only available when two or more videos are extracted simultaneously.
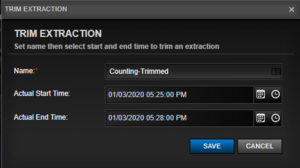
- Trim Extraction – remove excess video. You must know the start and end time portion of your extracted video that you wish to keep. Input those two times and only the video between those two periods will remain.
- Previous < – Move to the previous extraction
- Next > – Move to the next extraction
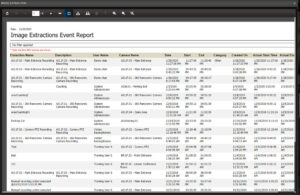
- Print – Print the Image Extractions Event Report
If you have questions about real-time extraction. Contact our sales engineers or tech support for guidance. Our team is available to help answer questions. Join us next quarter for this ongoing series. We’ll learn about “Locating Extracted Files.”
LENSEC Partners are sharing their thoughts and thanks for the job our team does everyday. As a part of LENSEC culture, our physical security specialists come alongside our partners and strive to help them succeed. Not only does the LENSEC team want to win business and make money as our company grows, but we really want our partners to win business and make money as well. When we both win, we can achieve success together.
Some of our partners have been joining us to spread the word about LENSEC by providing video testimonials about their experience with our team and our flagship software, Perspective VMS®. Here are just a few we wanted to share with the public.
AQUILA SECURITY & ALARMS – MAX SCHLOSSER
LENSEC and Perspective VMS® are a good fit for Aquila Security & Alarms. Aquila Project Manager, Max Schlosser, says his company compared LENSEC with the competition and LENSEC wins due to a helpful integration with Bosch Security cameras and systems. Max says, “We were looking for a system that is easy-to-use and easy to program, on our end and for the end-user.”
Here’s more in this video testimonial from Aquila Security & Alarms.
DOBIL LABORATORIES – CHARLIE DRUZAK
Dobil Labs has been a dedicated partner with LENSEC, including Perspective VMS® in key security deployments in and around Pittsburgh, PA. Charlie says the world-class support that LENSEC offers has been a game-changer for Dobil. Charlie Druzak says, “Everything we’ve ever asked from LENSEC has been awesome. Anything we’ve ever needed, LENSEC has been on board 100%.”
Here’s the video testimonial from Dobil Labs.
ELLIOTT DATA SYSTEMS – MATT BUYDOS
Elliott Data Systems sells and supports security deployments in the Midwestern US. Matt Buydos, VP of Sales, says the integration with 3rd party security systems and Perspective VMS® has helped them win business and customer satisfaction. Matt says, “The thing we love about the LENSEC solution is you guys take an agnostic approach to it. Your focused on the video surveillance – the video management side of things. There’s a lot of value in looking out for the customer’s best interest instead of trying to push a camera on a customer.”
Take a look at this video testimonial from Elliott Data Systems.
LENSEC would like to thank these partners for giving their testimonial about the capabilities we provide to our clients. LENSEC has employees with decades of experience and we want our partner to win with their customers. If you are interested in learning more, our Regional Sales Managers would like the opportunity to talk with you. You can schedule an appointment and our team will demonstrate the power of Perspective VMS®. Click the link below to schedule an appointment today.
LENSEC has made sure that Perspective VMS® is available for users speaking several languages. This is important to our global customer base. By default, PVMS allows users to display interface text in English. However, we also give users an ability to select their preference of Spanish, French, Portuguese, Russian, Malaysian, and Arabic. This is helpful for many people around the world who do not speak English as their first language.
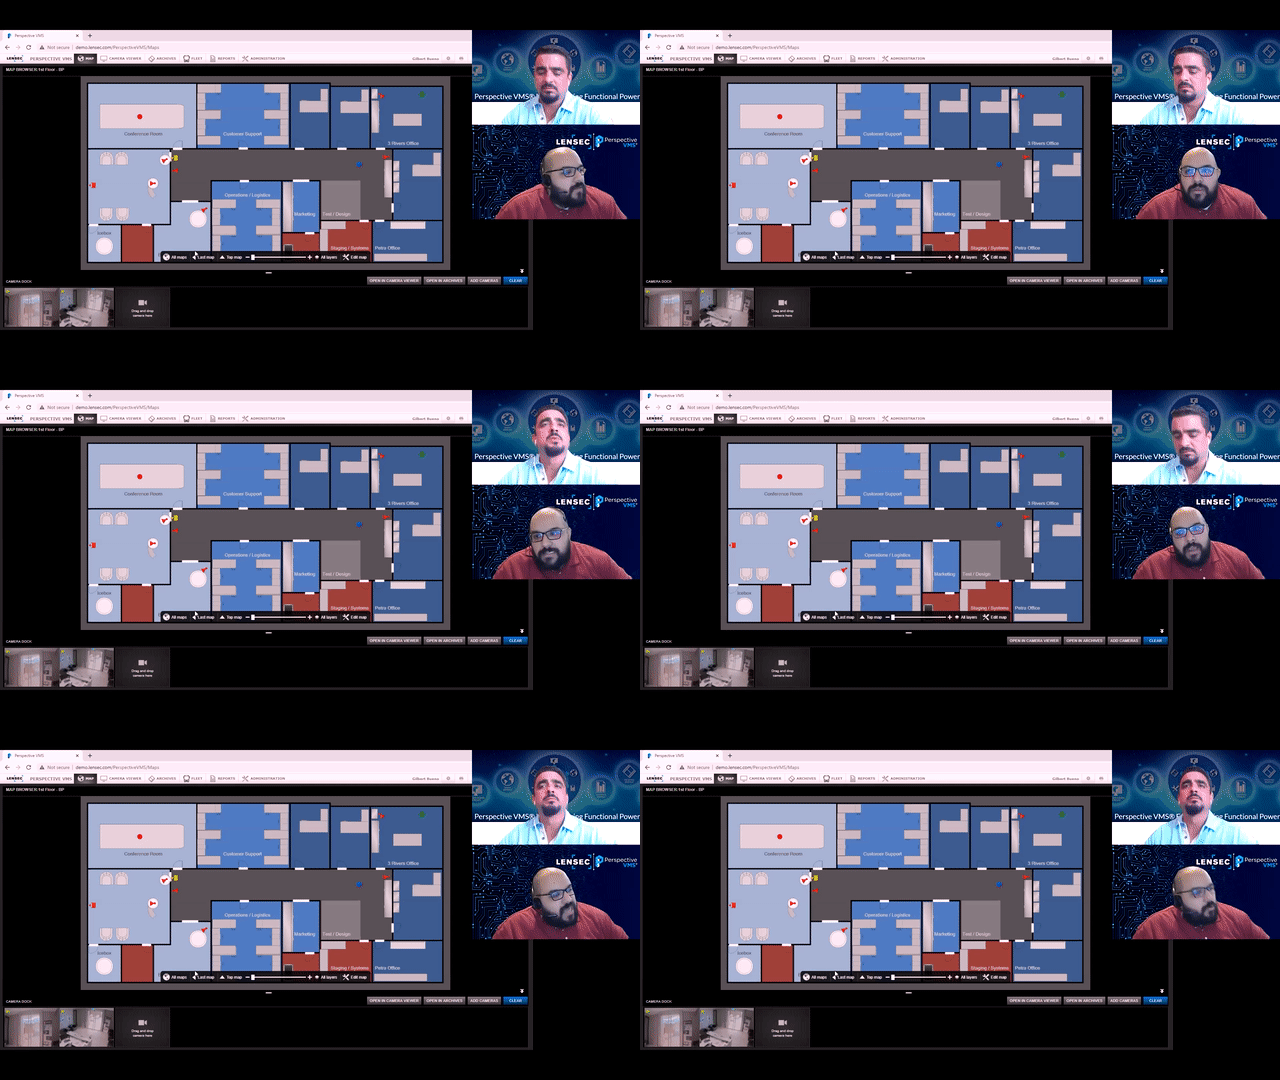
Recently, the LENSEC Team gathered a few of our Spanish-speaking physical security experts to demonstrate the “Power of Perspective” in Spanish. Gilbert Bueno and Marcial Torres recorded a video demonstrating many key features of Perspective VMS for us during a recent episode of the “What’s Your Perspective?” broadcast. Check out the PVMS demo en Español displayed in the video below.
“What’s Your Perspective?” Live Broadcast from LENSEC is passing a landmark of 25 episodes. This is a notable landmark because the program was developed in response to the global pandemic. The LENSEC team presents topical information for the public regarding physical security news in today’s business climate.
When the COVID-19 pandemic hit the world in March of 2020, many businesses scrambled to adjust their plans for the year. LENSEC was no different. As part of our approach to marketing, LENSEC leadership quickly implemented live broadcasting via social media and on our website designed to inform and educate people on security industry topics. The resulting effort led to the creation of the “What’s Your Perspective?” live broadcast and podcast.

Neil Haley leads the LENSEC efforts, using his skills as a broadcaster to host the “What’s Your Perspective?” program. Neil is a skilled interviewer and produces several podcasts when he isn’t working at LENSEC as our inside sales associate. Since we began the program, Neil has worked tirelessly to provide excellent content and guidance, securing guests to discuss security industry topics.
The “What’s Your Perspective?” Live Broadcast is produced weekly, airing on Wednesday’s at Noon (US Central Time). The program may be found on our website at LENSEC.com/live.
Every week the broadcast is also streamed live to our social media channels. You can find us live on LinkedIn, Facebook, and Youtube. Join us for the live broadcast or check out our episode archives.
NORTH AMERICA PVMS VIRTUAL TECHNICAL CERTIFICATION TRAINING
DATE: November 12-13, 2020 (US Central Daylight Time)
LOCATION: Online Link To Be Provided
MIDDLE EAST & NORTH AFRICA
PVMS VIRTUAL TECHNICAL CERTIFICATION TRAINING
DATE: November 24-25, 2020 (MENA Eastern European Time)
LOCATION: Online Link To Be Provided
THIS IS THE LAST SCHEDULED TRAINING FOR 2020
Register Now To Access Online Training
NOTE: Prerequisite Training Required | PVMS Online Training Academy: Basic User Certification

LENSEC Headquarters
3151 Briarpark Drive, Suite 125
Houston, TX 77042 United States
LENSEC.com | +1 (713) 395-0800
Contact Us for a PVMS
Sales Demonstration or
Free 30-Day Software Trial

