JANUARY 2021
THE LENSEC PERSPECTIVE NEWSLETTER

Perspective VMS® & Healthcare Security Solutions
By: Keith Harris
LENSEC is a security manufacturer with decades of experience working with healthcare organizations. Our team of physical security experts know the right security solutions hospital and clinic personnel need to get the job done.
Perspective VMS® is the foundation of a unified security platform. Our engineers recommend integrating multiple security tools and using PVMS to monitor systems across one or many enterprise locations.
PVMS is a browser-based video management software that streams and captures IP security camera video. It is a powerful enterprise application that also unifies the security platform by integrating many valuable third-party security tools, such as access control, video analytics, artificial intelligence, asset management, and much more.
 The Face Mask Detection Analytic is now available to identify whether a person is wearing or not wearing a face mask. This analytic can set off a workflow to quickly alert staff to non-compliant people on campus.
![]() In today’s changing environment, more hospitals and clinics are leveraging safety procedures before admitting patients into their facility. Access Control locks on doors are a protective barrier that medical offices may use to refuse admittance to unauthorized visitors. Perspective VMS® offers integration with access control, including visual verification of people before remote access is granted.
In today’s changing environment, more hospitals and clinics are leveraging safety procedures before admitting patients into their facility. Access Control locks on doors are a protective barrier that medical offices may use to refuse admittance to unauthorized visitors. Perspective VMS® offers integration with access control, including visual verification of people before remote access is granted.
To learn more, take a look at our product brochure explaining the video management software or schedule a demo with a LENSEC representative to discover the power of Perspective VMS.
LENSEC Announces PVMS Integration With RS2 Access It! Universal Access Control Software
By: Keith Harris
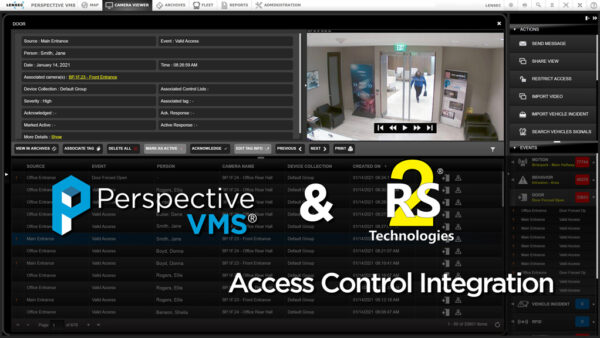
LENSEC and RS2 Technologies are announcing a new integration partnership providing customers and partners with greater efficiency and flexibility when combining LENSEC’s Perspective VMS® and RS2 Access It! Universal access control software.
PVMS software by LENSEC can control doors by issuing access control commands to locks and devices equipped with Access It! Universal access control from RS2. From the Video Management Software, users can control doors from the map module or the camera viewer module, or even by incorporating automated logic workflows from Perspective VMS®. The software integration also pulls event information from RS2 software and can import RS2 devices from the access control configuration database.
This technical collaboration allows the RS2 access control events to become searchable in Perspective VMS®. These events may be associated with security video and tagged as the events occur. Events are also found in transaction history reports, allowing system administrators to filter and search for activity, such as cardholder access, invalid entries, doors forced open, and more. The associated video improves the record with visual verification. As with other archives, this video of the access control event can be extracted, shared internally, and downloaded as watermarked evidence for law enforcement or interested third parties.

“Working alongside LENSEC to integrate the Access It! Universal access control software allows RS2 to strengthen its software using innovative video management for faster response times and greater intelligence for customers,” said Jeff Bransfield, National Sales Manager, RS2 Technologies. “Access control goes hand-in-hand with video surveillance, creating a cohesive approach to security and strengthening situational awareness across an organization.”
Integration between security software products is a way to make PVMS more useful for users. Our team of software engineers continues to develop more powerful integrations, making PVMS a relevant choice for security deployments.

Jeff Kellick, Chief Product Officer for LENSEC, says the company is looking to improve solution offerings by providing increased flexibility to customers and certified systems integrators. Kellick adds, “This integration allows many more customers to operate their electronic access control and video management software within a unified environment, creating an efficient approach towards facility automation, safety, and security. We aim for our users to save critical time when responding to threats or disturbances with real-time video, incorporated automatic workflows, and forensic search of data related to these access control events.”
LENSEC has a history since 1998 as a pioneer in video management software. Perspective VMS, the company’s flagship enterprise software, is an advanced video surveillance platform providing effective, remote situational awareness and security management of facilities. Customers with IP cameras rely on PVMS to manage and stream video from thousands of IP cameras at geographically diverse sites.
LENSEC’s physical security experts are well-versed in complex security projects, including commercial properties, government sites, educational facilities, critical infrastructure, and much more. LENSEC employees offer their expertise, meeting the company’s goal to keep people and property safe. LENSEC distributes PVMS through a channel of security integrators.
RS2 Technologies is a leading manufacturer of access control software. The Access It! Suite of software is where security professionals turn when they need an effective and reliable access control solution.
Contact the LENSEC team today to learn more about the partnership between RS2 Technologies and LENSEC.
PVMS & RS2 Use-Case Examples
A Day In The Live Of Easy But Secure Access In A Unified Security Platform
By Patrick Hart
Combining the power of two security tools is never easy, but it is necessary and exactly what the end-user wants. Pairing the power of Perspective VMS® with the extensive access control features in RS2 Access It! Universal software creates a unified security platform that exceeds expectations. Here are a few scenarios that the integration between PVMS and RS2 can accomplish.
 Scenario #1
You walk up to the door and present your badge to the reader but the door does not open. You think, “I’ll wait and follow someone in,” but you know the this is a security violation. Besides, the PVMS/RS2 anti-tailgating integration workflow will notify security and your boss. So, you push the intercom and connect to the GSOC in undisclosed location in another state. They ask you for your employee ID number and let you in remotely. The PVMS integration lets the remote operators see you and they can remotely pulse the door lock, letting you in. This feature utilizes the access control integration with RS2.
 Scenario #2
COVID-19 is rampant and to reduce the spread, the company policy is for all employees to wear a mask. You walk up to the door and it fails to open when you swipe your card. A small integrated IP speaker broadcasts a reminder that you must wear a mask while in the building. You put on your mask and swipe again and this time the door lock releases, letting you in. The integration with PVMS/RS2 with Facemask Detection are communicating in the background to recognize the pre-defined parameters and the entire process is seamless and invisible to you.
 Scenario #3
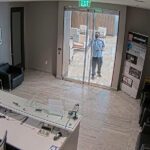
Important packages need to be delivered after-hours but the company is short-staffed for the late shift. You’re expecting a package, but not sure who will hear or even answer the door during the evening shift. As a PVMS authorized user, you can monitor the door remotely for the delivery. Now, you can pulse and unlock the door remotely, letting the courier in with your package without any delays.
With the PVMS/RS2 integration deliveries can be occur at any time of day. Events are automatically logged in PVMS for monthly reports. Video verification and PVMS workflows simplify the process for you and enable real power via a unified security platform when combines with RS2 Access It! Universal access control hardware and software.
If you would like to find out more about how the PVMS/RS2 integration works, please reach out to us to schedule a demo. We can show you the power of Perspective VMS® and RS2 Access It! Universal Access Control.

LENSEC Releases PVMS v4.3.1
By: Keith Harris
LENSEC has just released the latest addition of Perspective VMS®. PVMS Version 4.3.1 is a minor release with some new features, enhancements, and maintenance items. Some highlighted features are as follows:
HIGHLIGHTED FEATURES
• PVMS will archive on motion via server-based motion analytic for cameras using h.264 codec.
• Camera Tamper Analytic added to alert, trigger workflow based on changes in camera’s field of view using a server-based analysis of the video stream.
PVMS ENHANCEMENTS
• Event-based workflow triggers enhance camera event configurations.
• Users have the ability to lock, unlock, and pulse all RS2 AccessIt! doors.
Here are downloads and documents available for PVMS:
• PVMS v4.3.1 Product Release Notes
• LENSEC Downloads Landing Page
• PVMS Product Landing Page
If you need assistance, please don’t hesitate to contact our team. Thanks for trusting in LENSEC and Perspective VMS®.

PVMS Use-Case: Property Management Company
By: Keith Harris
Property managers have a difficult time keeping an eye on their locations when they have many buildings spread widely across a region. Managing security at these locations is even more challenging. A property management company in Colorado is using Perspective VMS® in a proactive approach to keep their security team aware of site activities.
IP network cameras were installed and used to remotely monitor site activity from the dispatch center. To prevent suspicious activity, team members want to know immediately when activity is occurring at a specific location during off-peak hours.
Now, with PVMS Workflows, the team receives an audible and visual alerts when suspicious activity is detected. Workflows use “If-This-Then-That” logic to raise alarms immediately.
PVMS Workflows are designed to automate processes and improve situational awareness for security personnel. These processes help dispatchers become more aware of activity in the secure locations. A notification, such as an audible alarm noting activity in a secure area prompt dispatch to act quickly.
In our scenario above, patrol units or onsite security are notified in real-time about suspicious activity. A quick response by the security team stops criminal activity quickly before the suspicious person has a chance to leave the area. The improved response time is appreciated by property management. Now site managers rest easy knowing a proactive security plan is stopping criminal behavior at their location. Keeping people safe and assets secure is facilitated by Workflows and Perspective VMS®.

PVMS Technology Is Proactive For School Security
By: Keith Harris
This year, more than ever, universities and K-12 schools are all facing unique challenges. With so many potential threats, educators are mitigating risks on many fronts. This makes for trying times with hard decisions ahead.
At LENSEC, our goal is to keep people safe and assets secure. That goal has never been more pertinent than now. Our team of physical security experts stands with you, ready to assist and provide the technology solutions to help you navigate through these uncertain times.
SOLUTIONS FOR TODAY’S ENVIRONMENT
Perspective VMS® by LENSEC is a video management software designed for securing one or multiple locations, streaming surveillance video from an unlimited number of cameras.
By unifying your school’s security footprint, you bring multiple, diverse systems under the umbrella of one management platform. Our team has integrated with many third-party security applications, such as access control, intrusion detection, video analytics, and more.
LENSEC is a proven partner, manufacturing the video management software needed to manage thousands of IP security cameras and other IP devices.
![]() Access Control connects door readers into the security footprint, monitoring activity from the access control system, and importing the event information into PVMS. Now users can see visitors at doors and manage to release those doors upon visual verification.
Access Control connects door readers into the security footprint, monitoring activity from the access control system, and importing the event information into PVMS. Now users can see visitors at doors and manage to release those doors upon visual verification.
![]() Intrusion Detection from alarm systems or video analytics is importable into Perspective VMS®. User notification with visual or audio alerts helps improve situational awareness. With workflow automation, administrators can receive alerts, even when they are away from campus.
Intrusion Detection from alarm systems or video analytics is importable into Perspective VMS®. User notification with visual or audio alerts helps improve situational awareness. With workflow automation, administrators can receive alerts, even when they are away from campus.
 The Face Mask Detection Analytic is an advancement on the existing face-detection analytic to now be able to identify whether a person is wearing or not wearing a face-mask. The analytic trigger can then set off a workflow to quickly alert your staff to non-compliant staff or students in secure areas.

Fleet Security Management is available in PVMS, providing security coverage onboard school buses. The fleet system brings transportation resources under the umbrella of the same security management tools used inside of education facilities.
If we can help you with your school security needs or show you more about the power of Perspective VMS®, please contact us to schedule a demo.

LENSEC SUPPORT: Bitrate & Camera Configuration, Part III
Camera Settings
By: Bryce Capodieci
Editor’s Note: Over the next few newsletters, we will focus on a four-part feature series designed to help people understand the intricacies of camera configuration and bitrate usage. Here are the topics we have planned for this series:
- July 2020: Choosing The Correct Codec, Resolution, & Video Quality
- October 2020: Smart Camera Locations & Image Complexity
- January 2021: Camera Settings
- April 2021: Summary of Solutions
Part 3 of 4
In the previous article, we discussed how external factors affect the camera’s bitrate. Such examples include camera placement and scene complexity. The focus being on removing unnecessary data to lower the bitrate. This article will focus on camera settings and technologies that will help reduce the bitrate.
 In some cases, some camera manufacturers have API’s in place that will allow third-party video management software to affect change on some of the camera’s configurable settings, such as resolution, frame rate, GOP (Group of Pictures), and video-streaming codec. However, most of the time you must log into the camera interface to update most of these variables and many others. It’s not a best practice to leave the camera in its default settings. These default settings are meant to give you the best video quality and performance. But there is a cost to this high performance. Having the highest level of video quality is not usually necessary in most installations. If there are a large number of cameras on the network, keeping default settings can slow down the network to where streaming video is very choppy and sluggish. These cameras can also bog down the server hosting these cameras. Lastly, they will take up an unnecessary amount of storage on your hard drives.
So where do you start? Where can you optimize systems settings without sacrificing too much on video quality? The easiest place to start is the frame rate. For most cameras, the default frame rate is anywhere from 20 fps – 30 fps. If the camera is monitoring cash transactions, casino tables, high speed objects, then having a high frame rate is obvious and necessary. But is this same frame rate required to monitor a school hallway, a warehouse, or a parking lot? The answer is… probably not. Bringing the frame rate down to 10 fps – 15 fps will work sufficiently in these scenarios. The human eye will find it difficult to detect the difference between 15 fps and 20 fps, but the amount of bandwidth and storage required for 20 fps versus 15 fps is substantially more. So dropping the streaming frame rate down to a range of 10 fps to 15 fps is your first step.
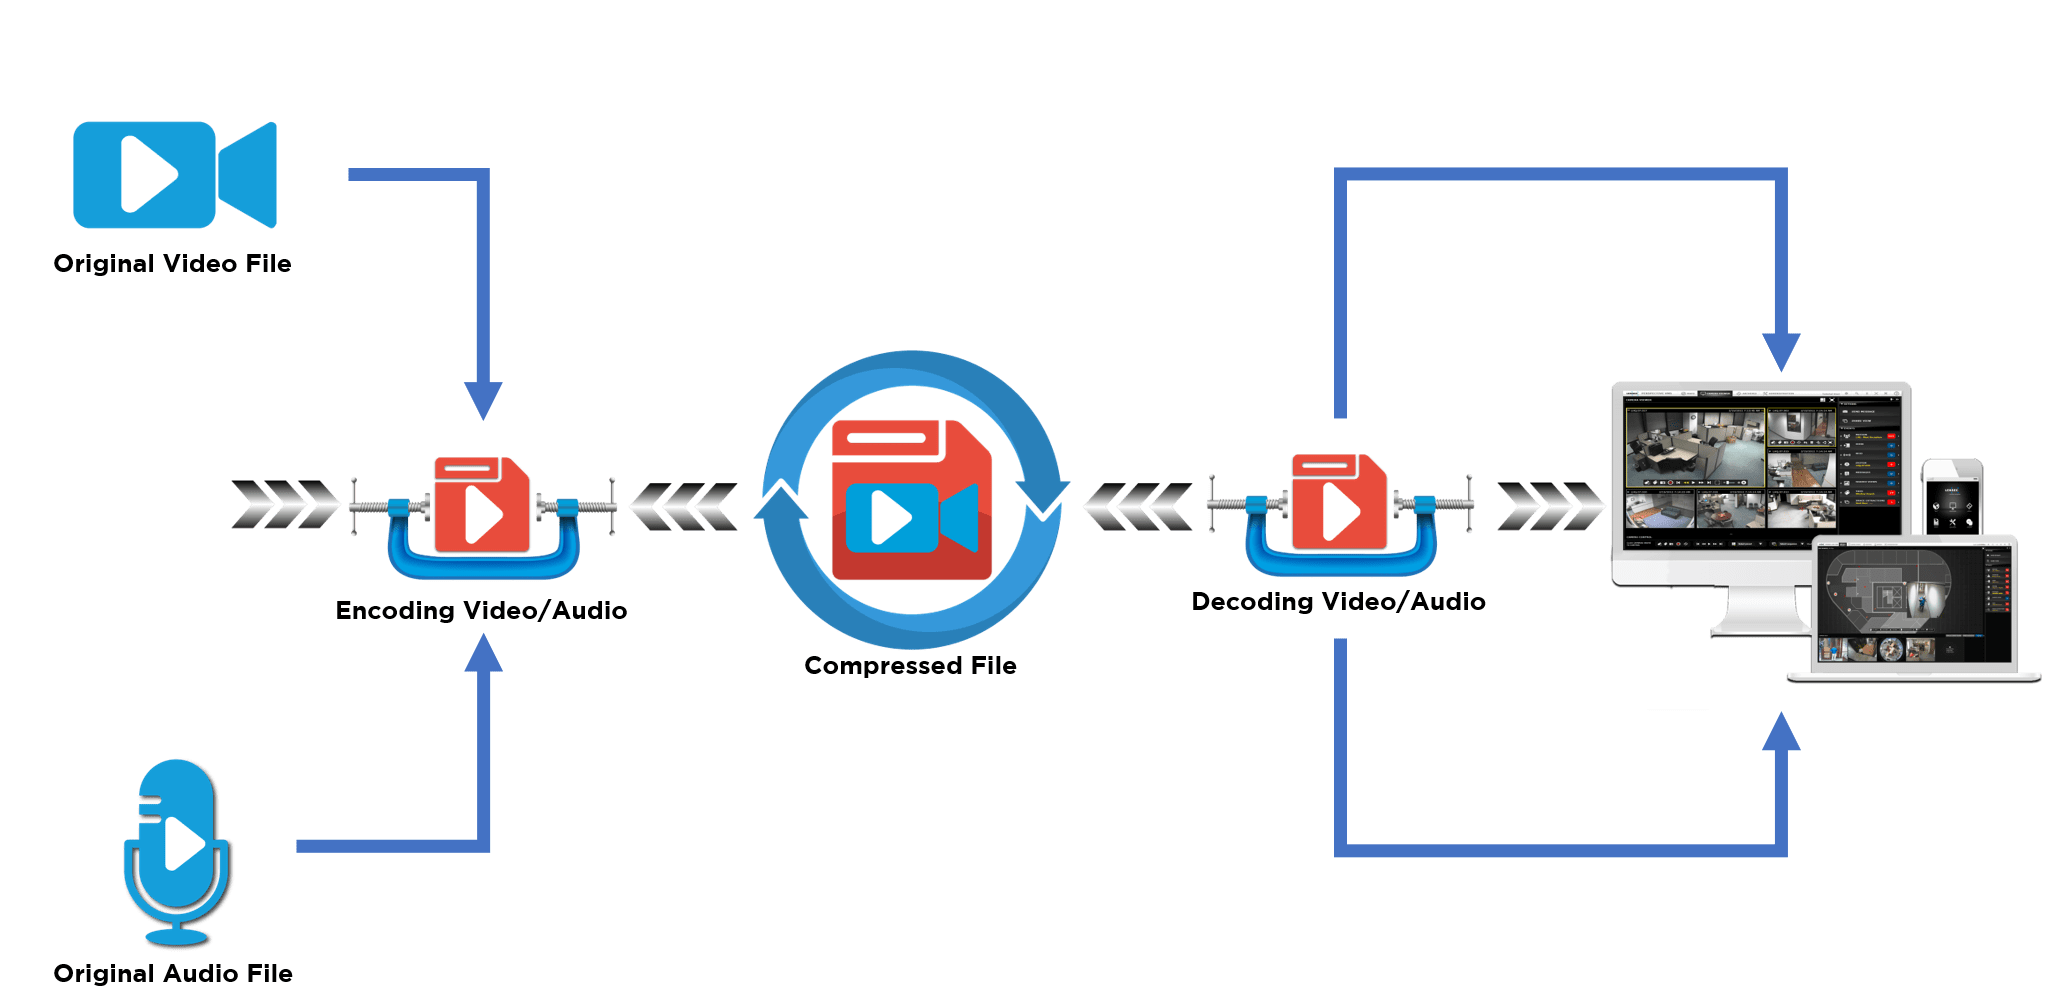
It is important to mention here that streaming codecs such as MJPEG, H.264 and H.265 all impact the bitrate differently in regard to the frame rate. When using MJPEG, the bandwidth and the bitrate increase proportionally since you are transmitting full, identical frames each second. H.264 and H.265 are more efficient at higher frame rates. The reason for this is because these codecs do not respond proportionally to the changes in frame rates because the identical frames within a sequence of video are not transmitted. We have more information on bitrate in Pt. 1 of this series.
 Optimizing the GOP (Group of Pictures) setting is not necessarily the next step, but since we were just talking about streaming codecs H.264 and H.265, it is appropriate to mention how this setting affects the bitrate. Adjusting this setting may take trial and error for the best performance. What does the GOP setting do? This feature controls the frequency at which I-frames are captured. The technology behind the streaming codecs H.264 and H.265 are based on I-frames and P-frames. Without going on a tangent to discuss this technology, just know that I-frames are complete images. The subsequent frames are P-frames that only consist of the changes from the I-frames. All other data is removed because it is redundant and unnecessary. How many P-frames exist until the next I-frame? That’s where the GOP setting defines the frequency of P-frames. P-frames are complete frames and increase the bitrate. As the GOP number decreases, more I-frames are transmitted in a shorter amount of time, so the bitrate increases. This also increases your video quality. As the GOP number increases, fewer I-frames are captured and thus the bitrate decreases. The trial and error comes into play here to raise this number as high as possible without affecting the video quality too much.
Adjusting the GOP parameter could be reserved for more advanced technicians. But updating the MBR (maximum bitrate) settings can be quite easy. This setting sets the maximum bitrate the camera will stream. The default settings are different for each manufacturer and increase as the resolution capabilities increase on the camera. What is the appropriate setting? The answer is that it depends on your network. If you have a low number of cameras on your network, plenty of bandwidth and storage capacity. You may not need to limit your max bitrate, so you don’t have to sacrifice on video quality while viewing complex scenes. However, a good rule of thumb to follow in situations where network bandwidth and storage is a concern, consider setting the max bitrate to match the camera resolution. If you are using a 2 MP camera at 10 fps, consider setting the maximum bitrate to 2000 kbps. At a lower frame rate of 10 fps, you can choose 1000 kbps per mega pixel of camera resolution. At this resolution and doubling your frame rate, it might be appropriate to increase your maximum bitrate by 1000 kbps. Again, this is only a rule of thumb and not specific science. You may need to monitor your bitrate and video quality simultaneously to ensure you are not capped out on the bitrate and sacrificing video quality.

It may go without saying that decreasing the camera resolution decrease the bitrate. “But I paid for an 8 MP camera. Why would I ever want to set this up for 2 MP’s?” That is a valid question. If you purchased a high resolution camera, it is understandable that you want to capture the detail this camera is capable of viewing. Instead you can review the other technologies the camera has to offer. Look for camera manufacturers that offer technologies to reduce the bitrate in low-light environments. In low-light environments, as the exposure time decreases more gain is used. More gain equates to more noise in the data stream which causes the bitrate to increase. Image stabilization may be another feature to utilize in tough environments that are subjected to wind or vibrations from traffic or heavy machinery. If the camera is constantly shaking due to the vibrations of its environment, that creates a very complex scene for the camera to capture, thus this will cause dramatic increases on the bitrate. Some camera manufacturers offer EIS (Electronic Image Stabilization). When enabled, this will dramatically decrease the bitrate. WDR (Wide Dynamic Range) is a great feature to use when low light areas and high light areas are within the same field of view. It may be difficult to disable this feature and lose the ability to identify objects or people within that same field of view. However, keep in mind that WDR usually increases the bitrate by 15-25%.
 As an integrator, you may be reading this while shaking your head. Who has the overhead to spend the time setting up each camera for such optimization? This work can be time consuming, multiplied by the high camera count on your deployment. The best advice to give here with an understanding that time is money, is to reach for the low hanging fruit. Reduce the frame rate and set a maximum bit rate appropriately. The other configurations can be reserved for situations where reducing the bitrate is critical for the system performance or if hard drive space is limited.
In the upcoming April 2021 article of this series, we will summarize the many topics covered in these three articles. With the knowledge presented in these articles, we hope you can make informed decisions to improve your surveillance system by decreasing unnecessary data, thereby decreasing your bitrate.

LENSEC Support: Extractions Series, Pt. 3
By: Bryce Capodieci
Editor’s Note: At LENSEC, we want to provide the best tools possible to our partners and Perspective VMS® end-users. We’re writing up technical guides for creating video extractions from surveillance video archives. Over the next few newsletters, we will focus on a four-part technical series designed to help with the key elements of video extractions. Here are the topics we have planned for this series:
- July 2020: Creating Real-Time Extractions
- October 2020: Locating Your Extracted Files
- January 2021: Creating Archive Video Extractions
- April 2021: Troubleshooting Real-Time Video Extractions
Part 3 of 4
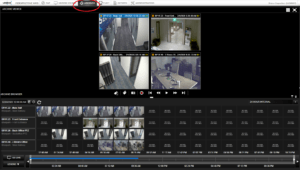
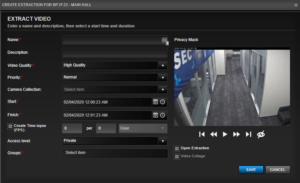
When you’re extracting video that has been recorded previously, you are identifying video that already exists on the system and marking the required video for safe-keeping until it can be downloaded to a media file that is designed for playback outside the PVMS interface.
Creating extractions from archived video is handled in the same way as creating extractions from real-time video from the Camera Viewer, except you navigate to the Archive Module. You can do single camera or multiple camera extractions.
1. To start, navigate to the Archives Module.
2. Once you have the number of video containers open for view, follow the steps from Camera Viewer Module: Real-Time Extractions. From the pop-up configuration window you can playback the extracted video clip immediately before saving to the extractions table. This is because the archived video is already stored.

