Creating Real-Time Extractions
By: Bryce Capodieci
Editor’s Note: At LENSEC, we want to provide the best tools possible to our partners and Perspective VMS® end-users. We’re writing up technical guides for creating video extractions from surveillance video archives. Over the next few newsletters, we will focus on a four-part technical series designed to help with the key elements of video extractions. Here are the topics we have planned for this series:

Real-time video extractions enable users to record live video and extract it from Perspective VMS®. This can be done with or without motion or external trigger, by a simple one-click interface on any camera view. Extractions can be created in both the PVMS Camera Viewer Module and the Archive Module. This technical guide will explain the proper steps for creating real-time video extractions.
Real-Time Extractions
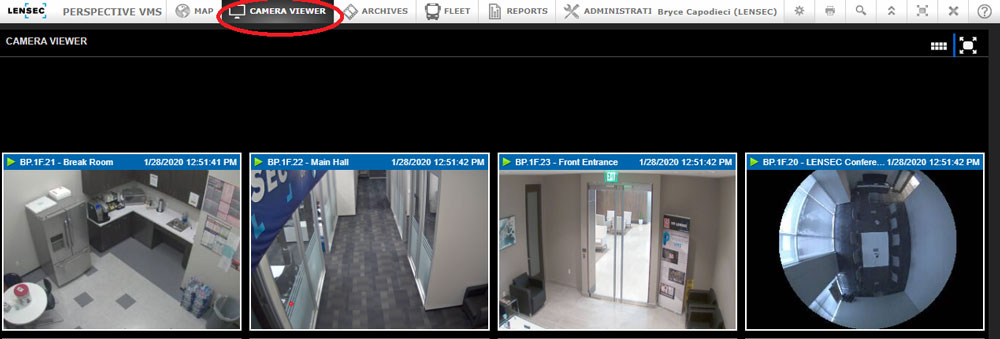
1. In PVMS, navigate to the camera viewer module.
SINGLE CAMERA EXTRACTION
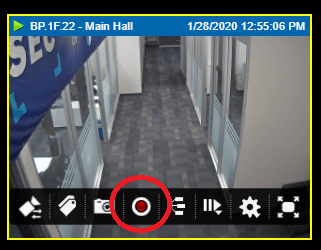
2. To extract real-time video, hover over the correct camera container. The camera overlay menu ribbon will appear at the bottom of the camera container. Click on the red ‘record video’ icon. ![]()
3. If you don’t see the red ‘record video’ icon , this means this camera isn’t set up for real-time extraction. To configure this feature in the administration module, a later article will cover ‘Troubleshooting Real-Time Extraction.’
Note: You must have permissions to configure this feature. Contact your PVMS administrator for support.
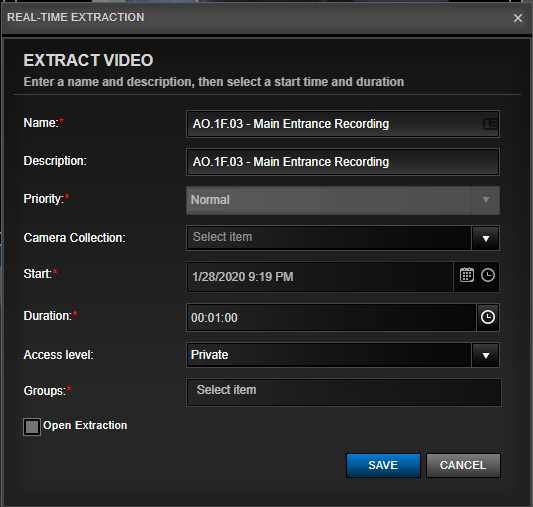
4. A pop-up window will appear. This window allows you to configure the details of the extracted video. Please note that since you pressed the record button, the extraction has begun recording, so you don’t need to feel rushed to complete these fields.
5. For your convenience, most of the fields are auto-filled with default information that you can reconfigure.
- Name: This field is auto-filled with the camera’s name. You can choose your own camera name.
- Description: This field is auto-filled with the camera’s name. You can choose your own description.
- Priority: The default setting is ‘Normal.’
- Camera Collection: You can select from the drop-down menu to add an optional camera collection with which to associate this extraction.
- Start: The start time appearing in this field is associated with when the real-time recording button was pressed.
- Duration: The default time is set for one minute. You can change this to any amount of time up to 24 hours. You can also select a preset time by pressing on the clock icon.

- Access Level: Default setting is ‘Private’, but you can choose the following permissions from the drop-down menu:
– Share: When ‘share’ is selected, only the PVMS users you select can view the extraction.
– Private: When ‘private’ is selected, only you can view the extraction.
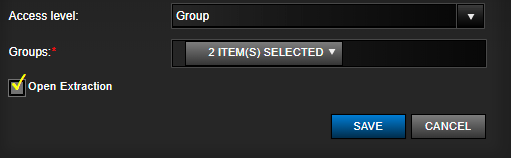
– Group: When permissions are defined by the group(s), you select from the drop-down menu from the ‘Group’ field.
- Group: By default, ‘group’ is inactive. When ‘group’ is selected under ‘access level,’ you can choose the group(s) from the drop-down menu. One or several groups may be selected simultaneously. Continue clicking on the groups you wish to add. To remove a group, click it a second time to deselect it.
- Open Extraction: If the check box is checked, the image extraction drawer will slide open from the right sidebar automatically after clicking ‘SAVE’.
Note: It may take several minutes before your video is ready to view.
- Save: When finished, click ‘SAVE’
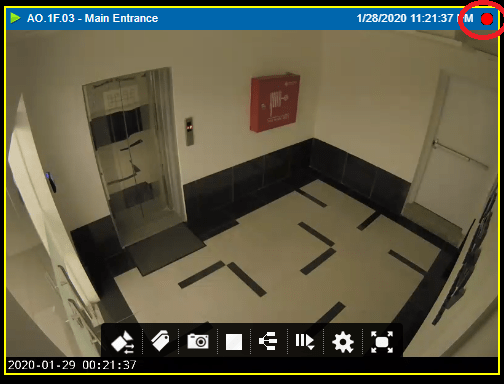
- Processing: While the video is being extracted, you will know the recording is in progress due to the flashing red recording icon in the top right of the camera viewer.
MULTI-CAMERA EXTRACTION
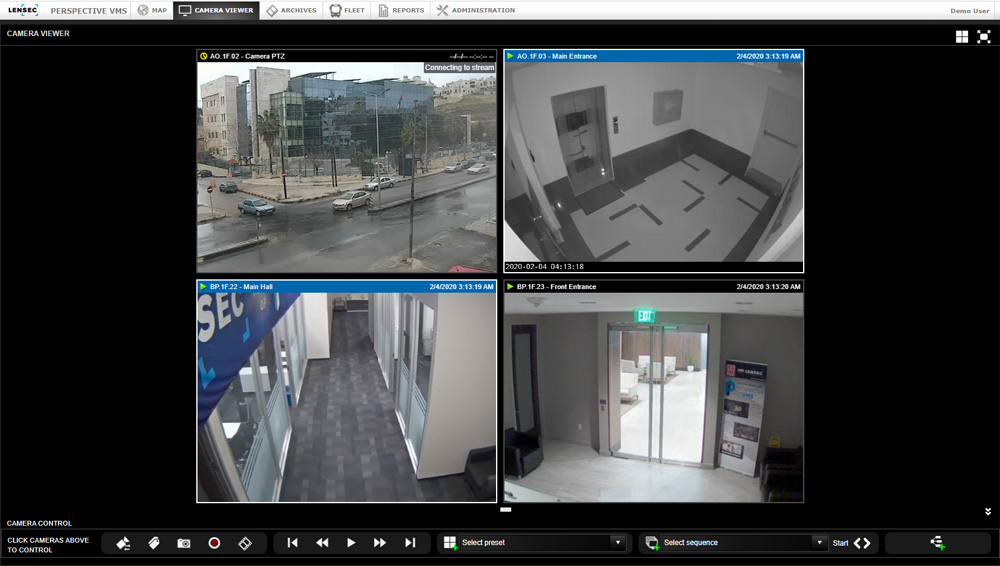
1. To create simultaneous extractions from several streaming videos, click on the black header of an individual video container within the Camera Viewer. When the header turns blue, it is selected. If you click it a second time, this deselects the video container; the blue header will revert to a black header. Repeat this process for each video container you wish to extract video. Note: In our example shown, we have selected two out of the four video containers to extract video.
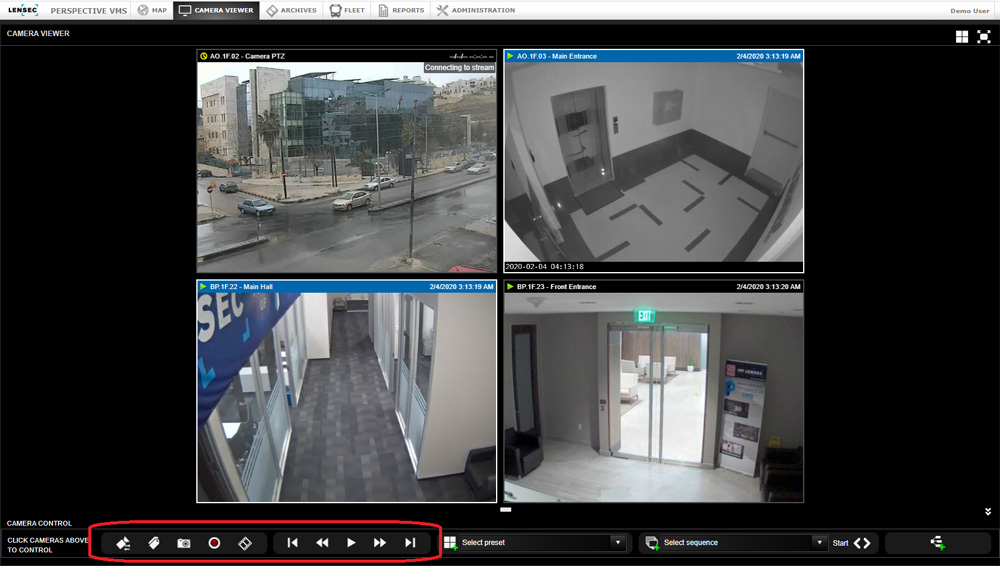
2. After the cameras are selected, navigate to the global camera control bar below the video containers and click on the red ‘record video’ icon.

3. After pressing the record button, please follow steps 4-5 from Single Camera Extraction, described previously in this article. Please be sure that real-time extractions are configured for each video container you select. To configure this feature in the administration module, a later article will cover ‘Troubleshooting Real-Time Extraction.’ If this feature is not configured for a video container, you will output an empty video file. The video thumbnail will display, “No Data Available.”
Note: You must have permissions to configure this feature. Contact your Perspective VMS admin for support.
4. In addition to steps 4-5, you have two new features available to you:
- Create Time-lapse (FPS)
- Video Collage
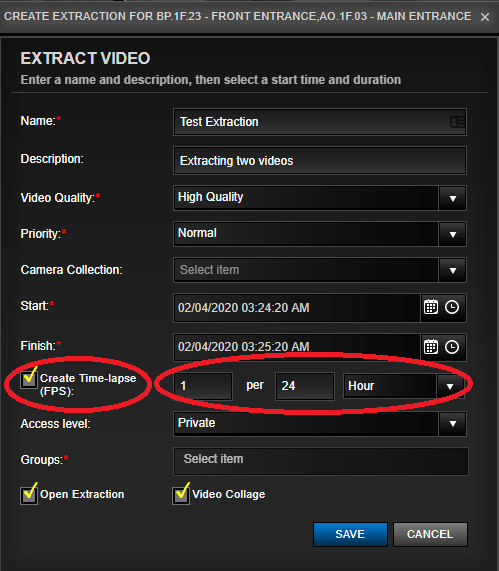
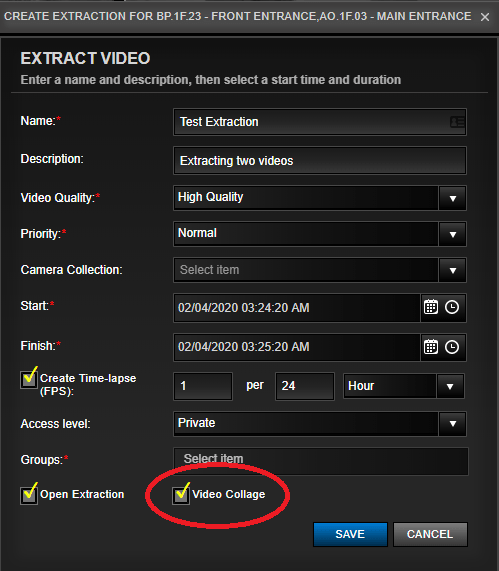
5. To create a time-lapse video, check the box. Then select the frequency of extraction. If done, click ‘SAVE’. In our case below, we have selected one frame (picture) for every 24 hours.
Note: You must make sure that the time-lapse frequency is within the Start and Finish time frame. Our configuration below of one frame per 24 hours would not work because the extraction between Start and Finish is only one minute.
6. To create a video collage, check the box. If done, click ‘SAVE’.
7. If you checked ‘Open Extraction’, the extraction table will slide open from the right after you click ‘SAVE’. Otherwise, follow the instructions for Locating Your Extracted Files.
NOTE: The article ‘Locating Your Extracted Files’ is upcoming for Part 2 of this series.
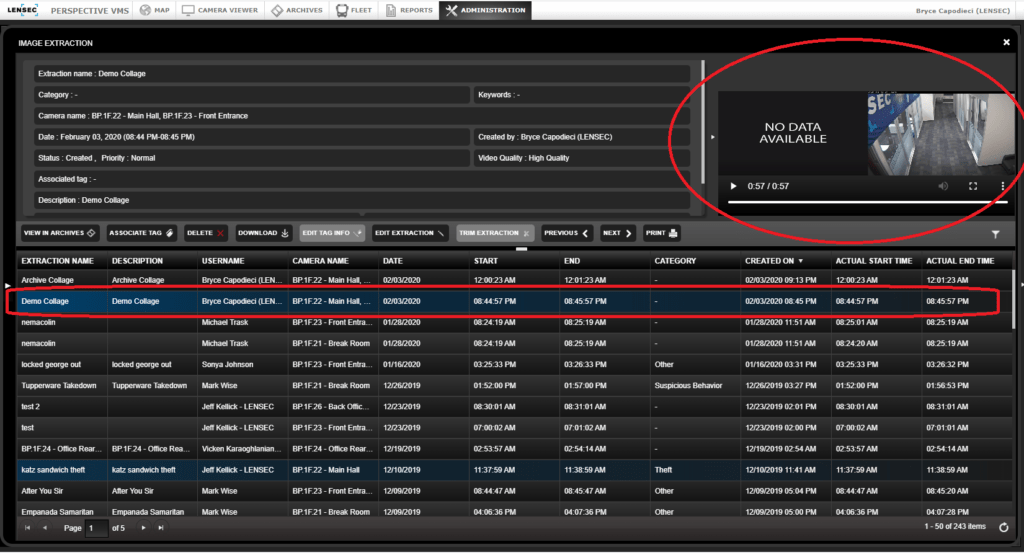
8. Once your extraction has loaded, highlight the extraction to view the details. In our example below, we extracted two videos. One of the cameras was not set up for video extraction. The photo below is how it will appear, notice the “No Data Available”. This is an empty video file.
If you have questions about real-time extraction. Contact our sales engineers or tech support for guidance. Our team is available to help answer questions. Join us next quarter for this ongoing series. We’ll learn about “Locating Extracted Files.”