
Locating Your Video Extractions
By: Bryce Capodieci
Editor’s Note: At LENSEC, we want to provide the best tools possible to our partners and Perspective VMS® end-users. We’re writing up technical guides for creating video extractions from surveillance video archives. Over the next few newsletters, we will focus on a four-part technical series designed to help with the key elements of video extractions. Here are the topics we have planned for this series:
Video extractions are created from recorded video. They can be made in real-time from live video or extracted from recorded video in Perspective VMS®. Once the video extraction is complete, users can download the file to be played in a standard media player, like VLC Player.
Locating the video extraction may seem tricky to the novice, but it’s a simple process. This technical guide will explain the proper steps for locating and viewing video extractions.
Viewing Your Extraction
1. If the ‘Open Extraction’ is checked when configuring your extraction settings, and after you click ‘SAVE’, then the Image Extraction table slides open from the right sidebar.
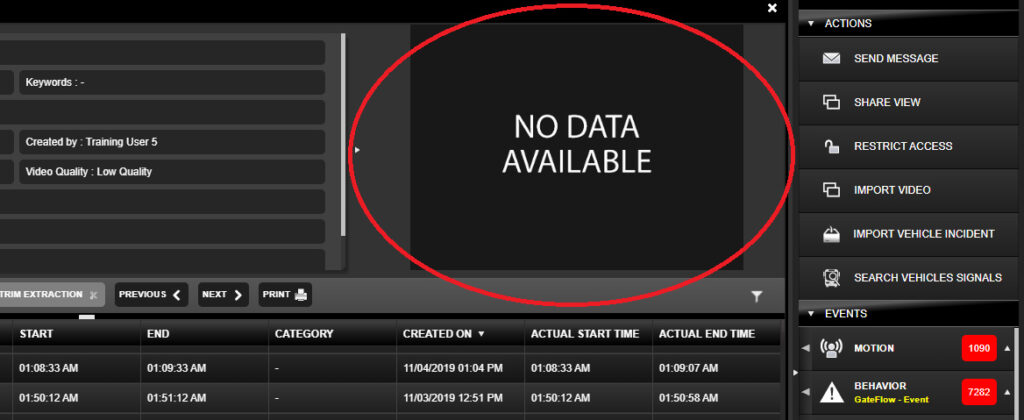
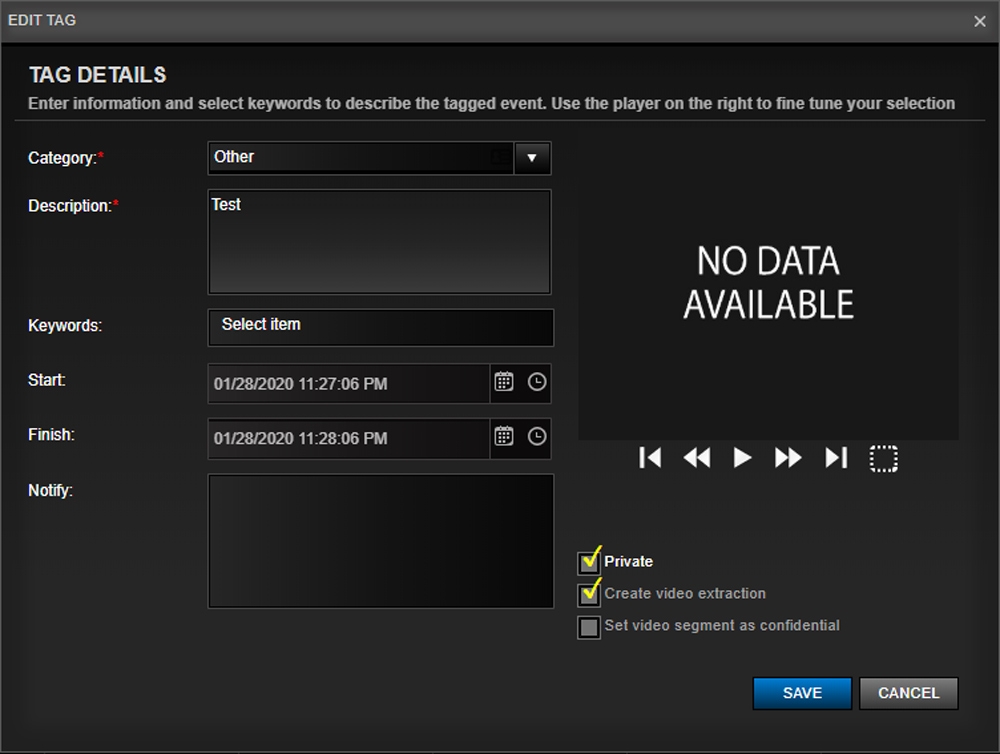
2. It may take a few minutes beyond the extraction duration you set for your video to compile. You will have to refresh your screen to view the video when it is ready. Until then, you will see “No Data Available”.
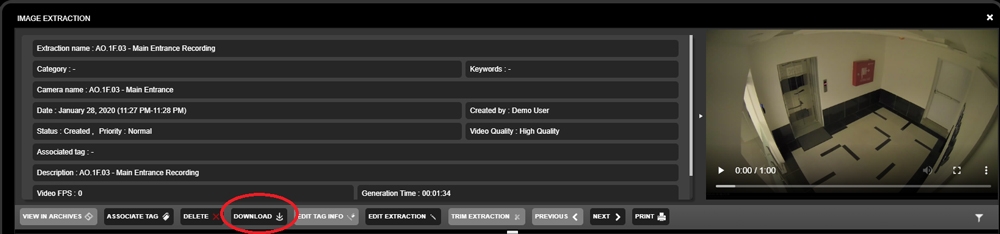
3. Once your video is available, you can click the download button to save the video in any location on your workstation or network that you specify.
Previous Extractions
1. If ‘Open Extraction’ is not checked when configuring your extraction settings, then you will need to manually locate the extraction.
2. To locate saved extractions, navigate to the right sidebar. If you can’t view the right sidebar, click on the arrow on the far right of your screen to expand the right sidebar.
3. In the ‘Events’ section, ‘Image Extractions’ is located at the bottom.
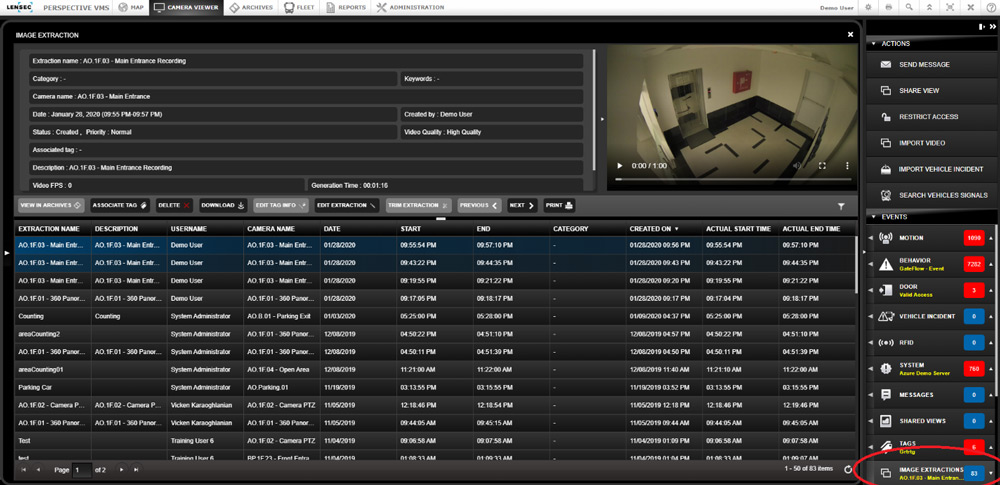
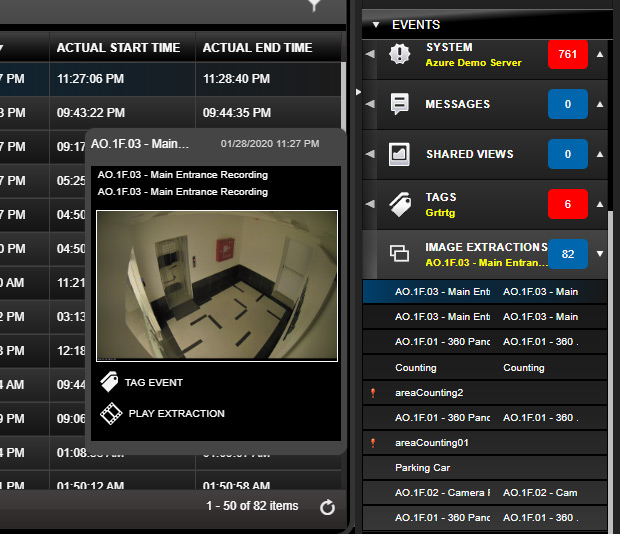
4. Click on ‘Image Extractions’ to open a quick view of the latest extractions. You may have to scroll down to see the list of these extractions that were saved. From the list, select an extraction. A video thumbnail will pop up so you can easily see and play the video. This is useful when you have many extractions saved and wish to easily find a specific extraction. You can easily click through the list to see the video thumbnails of each extraction listed.
- Each of the items within the ‘Events’ category has boxes with numbers. These are the recorded number of alerts or events.
- The number represents the current number of alerts or events in that category.
- If the box is red, the alert or event has not been viewed or acknowledged.
- When you acknowledge or view an alert, the box turns blue.
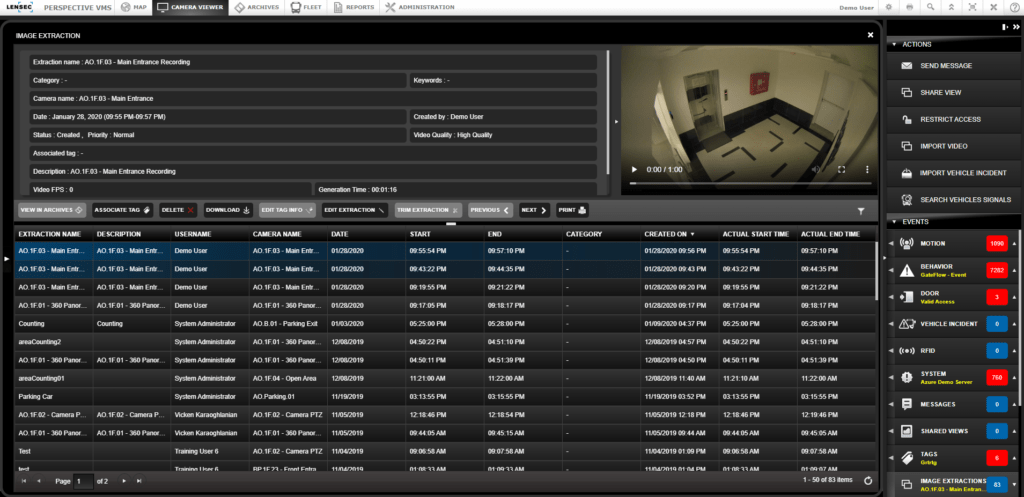
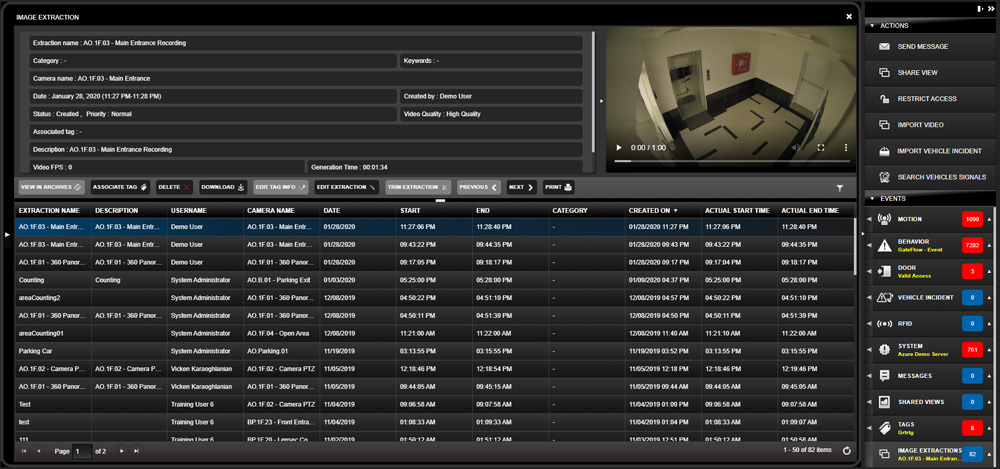
5. To see the detailed table view of extractions, click the arrow pointing left on ‘Image Extractions’.
6. This table stores the complete list of extractions, located on the bottom portion of the screen view. Each column is sortable. Click to highlight the extraction you wish to view. Each column within the row displays the information you configured for the extraction. The top fields provide some additional information about the extraction.
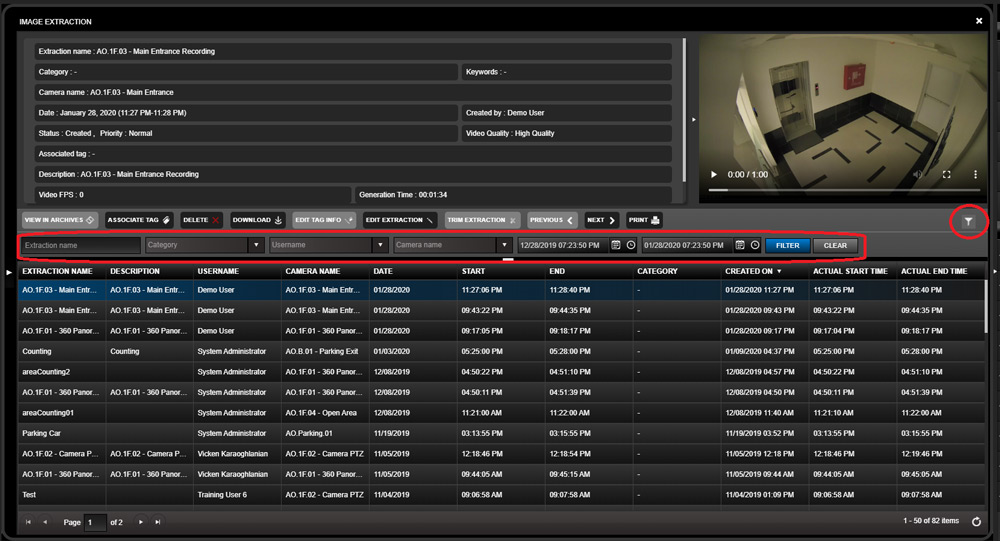
7. To search for your extraction, click on the filter icon ![]() . Several search fields will appear. To narrow your search, you can search by one or more of the following search criteria. Once selected, click ‘Filter’ to retrieve your search results.
. Several search fields will appear. To narrow your search, you can search by one or more of the following search criteria. Once selected, click ‘Filter’ to retrieve your search results.
- Extraction name
- Category (drop-down menu)
- Username (drop-down menu)
- Camera name (drop-down menu)
- Date – begin
- Date – end
8. There are several buttons that can be used to interact with the extraction. If the button is greyed-out, that particular action is not available for this specific extraction. As an example, if the extraction is still in process, most of the buttons will not be available until the extraction completes.
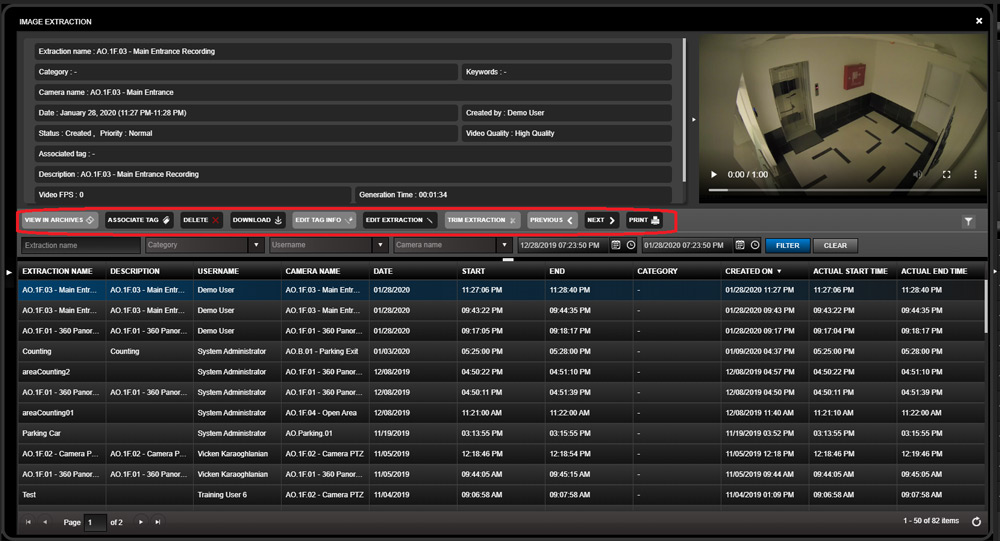
- View In Archives – Click this button to view the recorded video from this camera
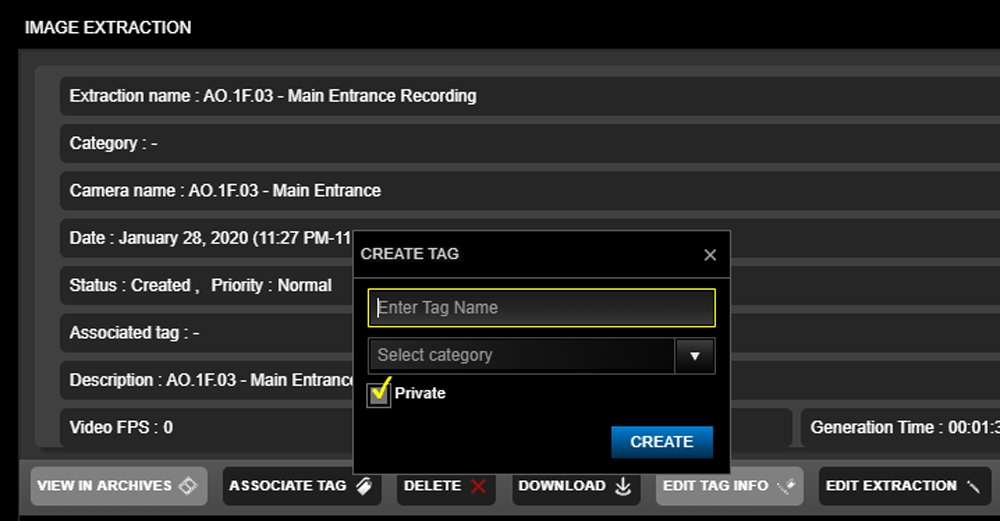
- Associate Tag – a tag is like a bookmark, use this feature to tag the archived video, which can be easily seen in the video archive timelines as a yellow band. Mark this as ‘private’ if only you need to see this tag.
- Delete – Remove the extraction from this list.
Note: the extraction will still appear in the audit logs. - Download – Download the extraction to any location on your workstation or network. This is permanently saved, until manually deleted.
- Edit Tag Info – Edit tag with updated information
- Edit Extraction – update the information you configured in your original extraction setup.
- Create Time-Lapse (FPS) – only available for archive video extraction.
- Video Collage – only available when two or more videos are extracted simultaneously.

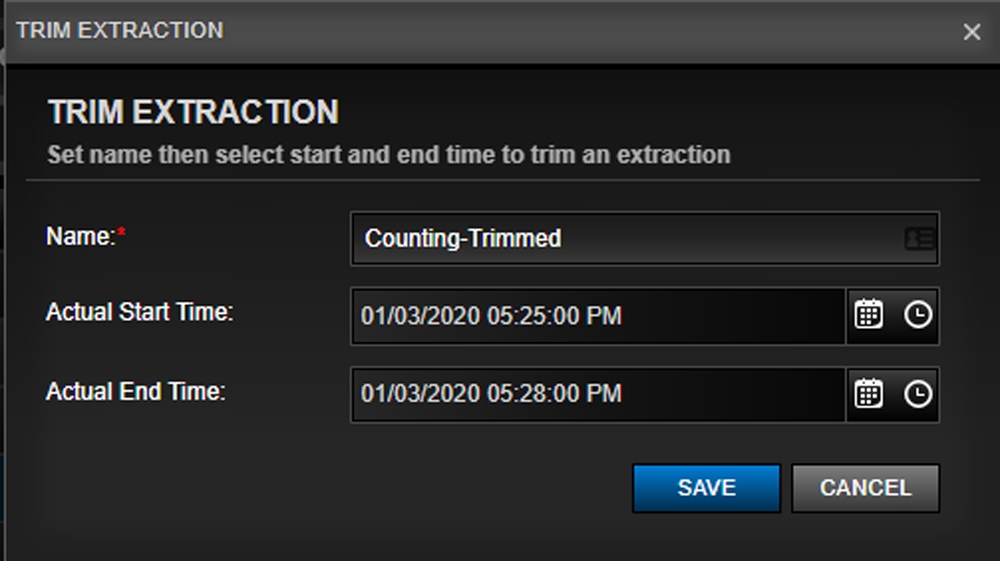
- Trim Extraction – remove excess video. You must know the start and end time portion of your extracted video that you wish to keep. Input those two times and only the video between those two periods will remain.
- Previous < – Move to the previous extraction
- Next > – Move to the next extraction
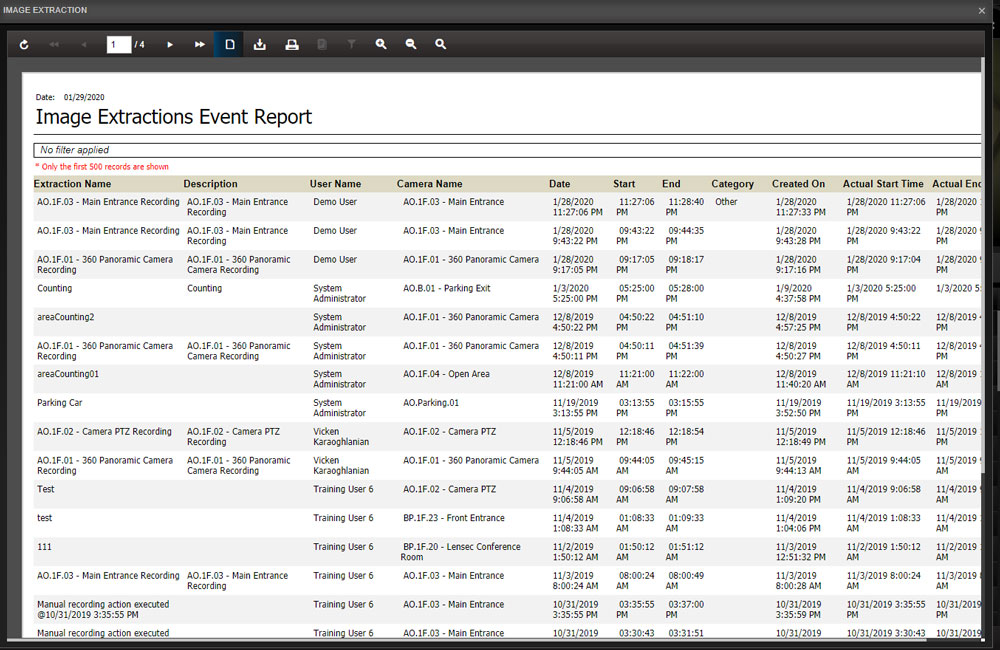
- Print – Print the Image Extractions Event Report
If you have questions about real-time extraction. Contact our sales engineers or tech support for guidance. Our team is available to help answer questions. Join us next quarter for this ongoing series. We’ll learn about “Locating Extracted Files.”